How do I trim a video?
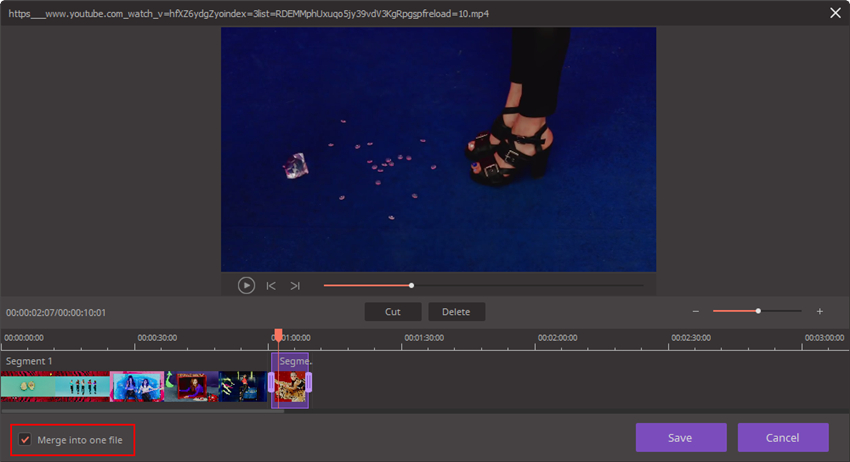
1. Click on the Trim button on the bottom the file thumbnail.

2. Drag the slider to select the section of the video you want to trim and click on the Cut button to cut it. And click Save button to save the changes.
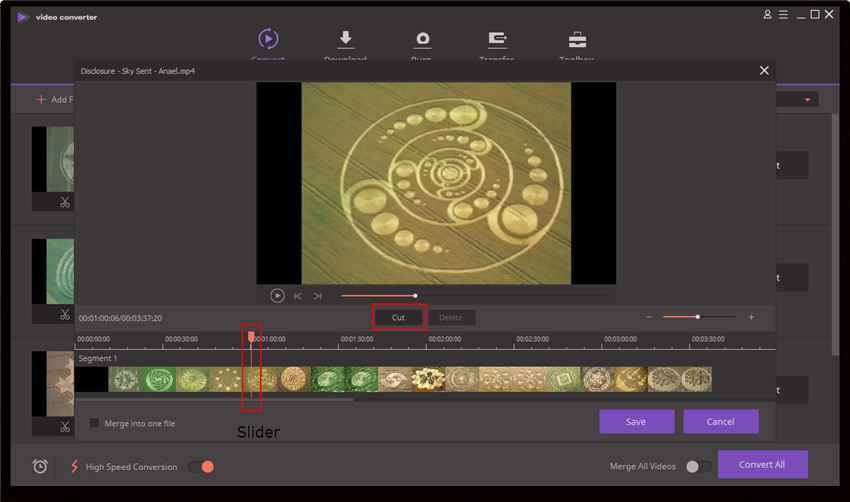
For example, there is a video in 3min and 10 sec, the part you want is the first one min and the last 10 sec, here is the way:
1. Drag the slider into the time of 1min and click on Cut. The video will be divided into Segment 1 and Segment 2.
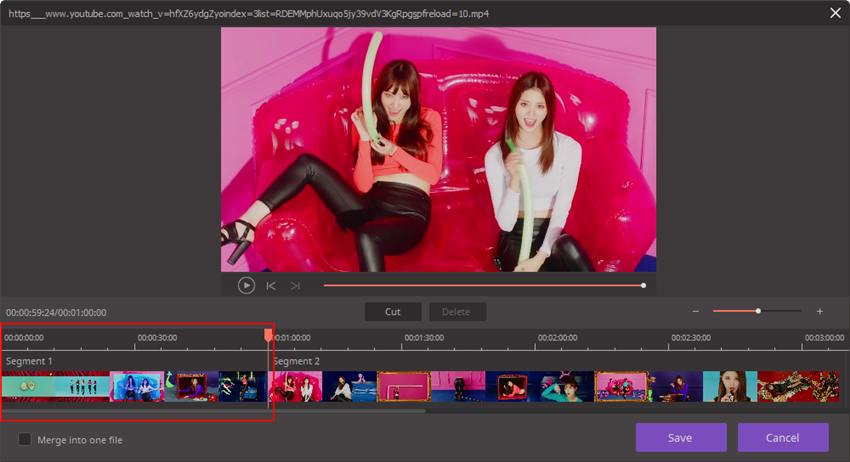
2. Drag the slider to the last 10 sec and click on Cut. The video will be divided into Segment 1, Segment 2 and Segment 3.
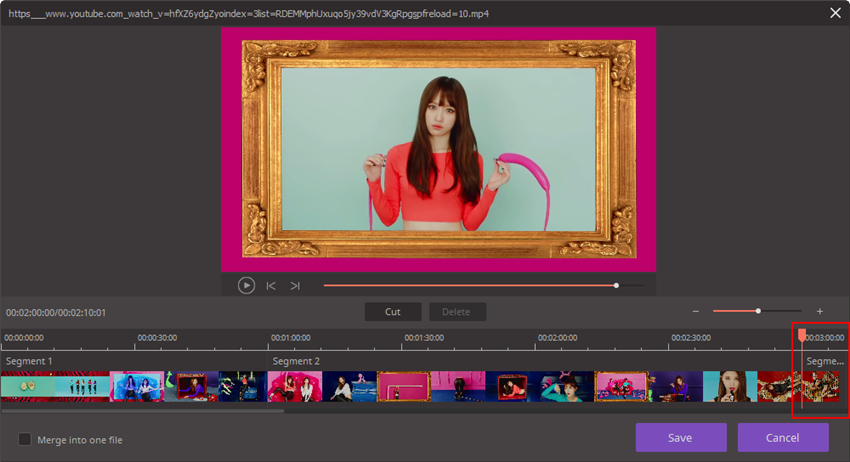
3. Click on the Segment 2 and click on Delete button to delete it.
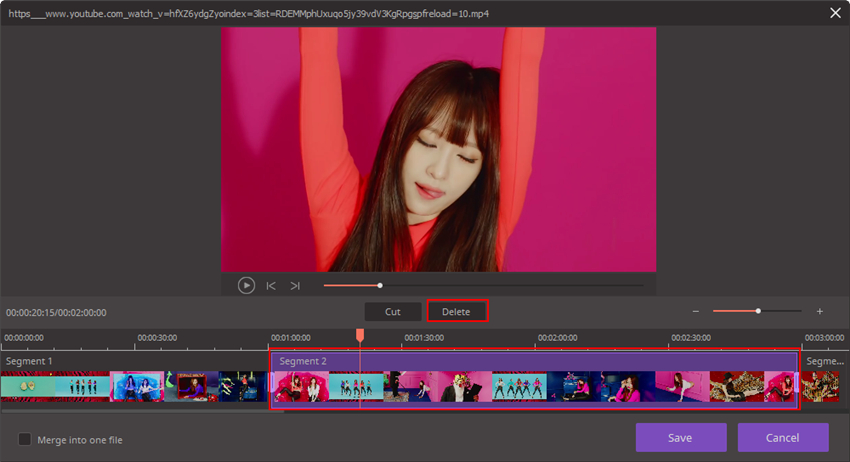
4. Segment 1 and Segment 3 will be left. Click on Merge into one file and click on Save button to save it.
Pack Up
How do I change the video effect?
Once you have loaded the file into the software, you can click the Effect button on the bottom of the thumbnail.
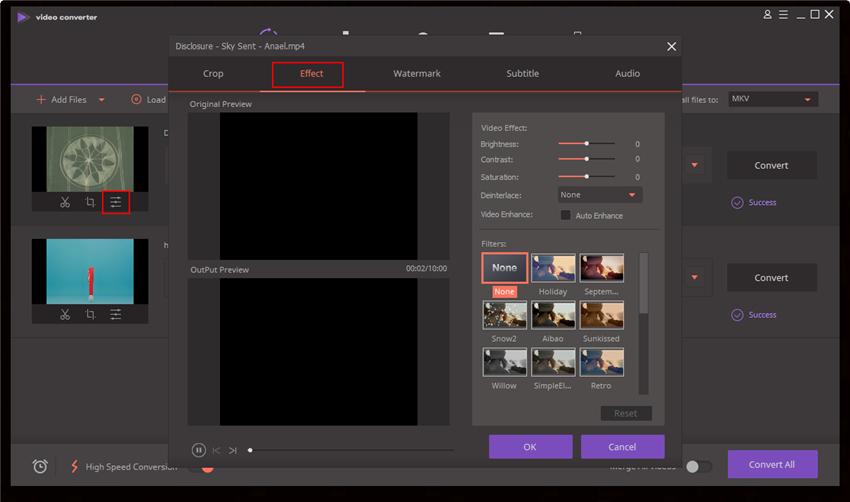
Once you have chosen an effect that you like, if the video ends up having distorted lines, select the Deinterlace option.
Tips: You can click OK to save the settings. For the changes to take effect on the output video you will have to convert the file.
Pack Up
How do I add a watermark to my video?
Once you have uploaded your file into the software, the following steps will allow you to add a watermark to your output file.
1. Click on the Crop/Effect button on the bottom of the file thumbnail.
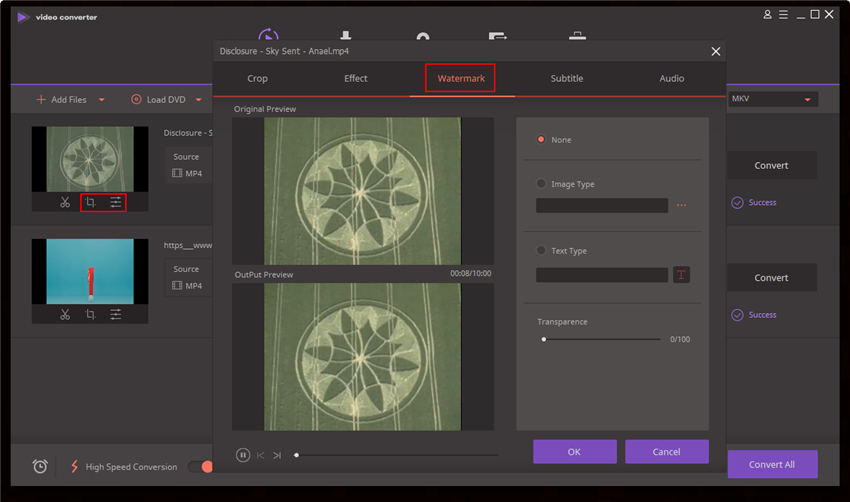
Select the Watermark tab and then choose Image Type and browse to find an image on your computer to add in an image watermark. Alternatively you can add a text watermark by choose Text Type and type the words that you want in the text box. Click the T button to define the font, color and other text settings for the watermark. You can then drag the added watermark onto the video screen to place it where you want it.
Tips:
If you decide that you don’t want the watermark added to the converted file, click None. Once you have converted a file and included a watermark, be aware that the watermark cannot be removed after the conversion is complete and your video is created.
Pack Up
How would I merge all of my videos into one file?
To merge your videos into one file, follow the steps below:
1. Click on the Convert tab and then click on Add Files or Load DVD button to load your source files.
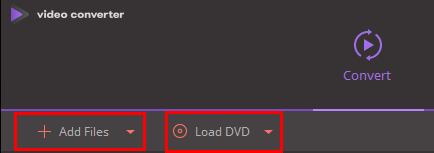
2. Turn on Merge all videos on the bottom of Convert tab.
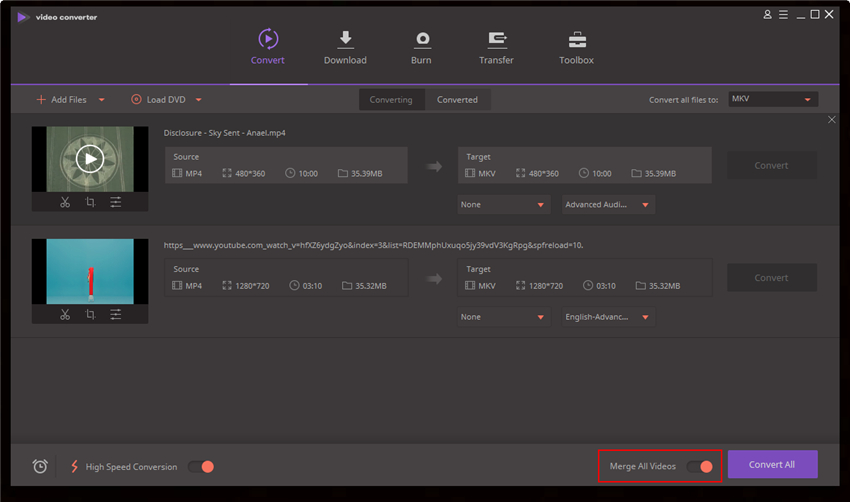
3. Choose your preferred Output Format in the section of Convert all videos to and then click on the Convert All button to start the conversion process. The output video will then have merged all of your videos in one.
Pack Up
How do I reduce the output file size of my converted file?
The final size of your output file will be determined by the length of the source file and your output settings. To reduce the file size, load in the file either by using Add Files or Load DVD, then click on the Target button, and choose lower resolution like SD under Video.
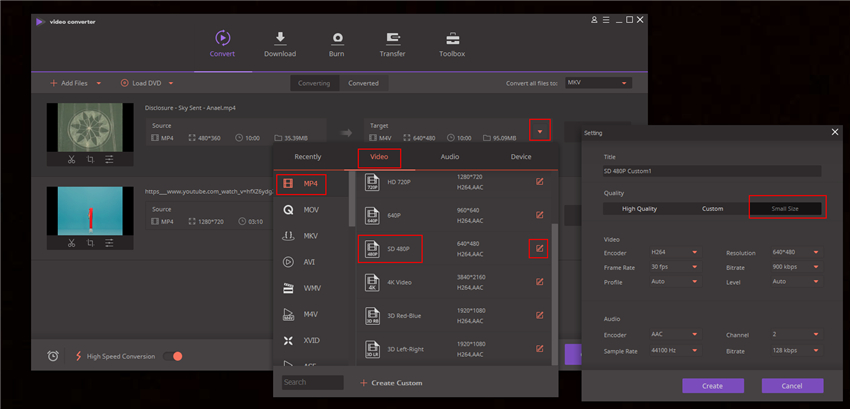
If you wish to have an even smaller output size, you can click the Edit button and select Small Size on the pop up window or Custom to customize it.
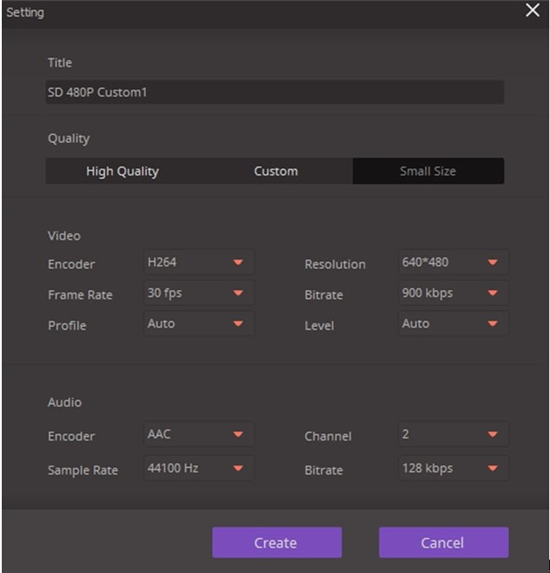
Note: If you set the output parameters to low it will reduce the output quality.
Pack Up
How do I use the metadata feature?
The following steps will direct you how to use the metadata feature.
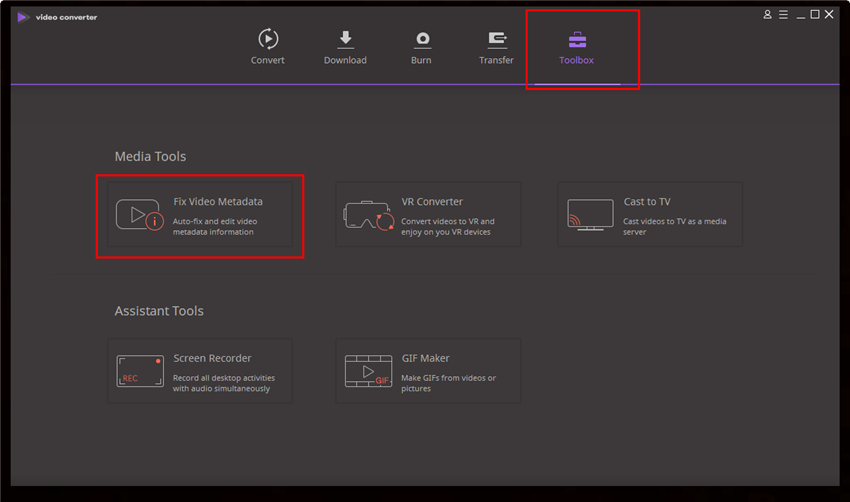
1. Go to the Toolbox tab > Fix Video Metadata. On the pop up window, click on the Add button to add file.
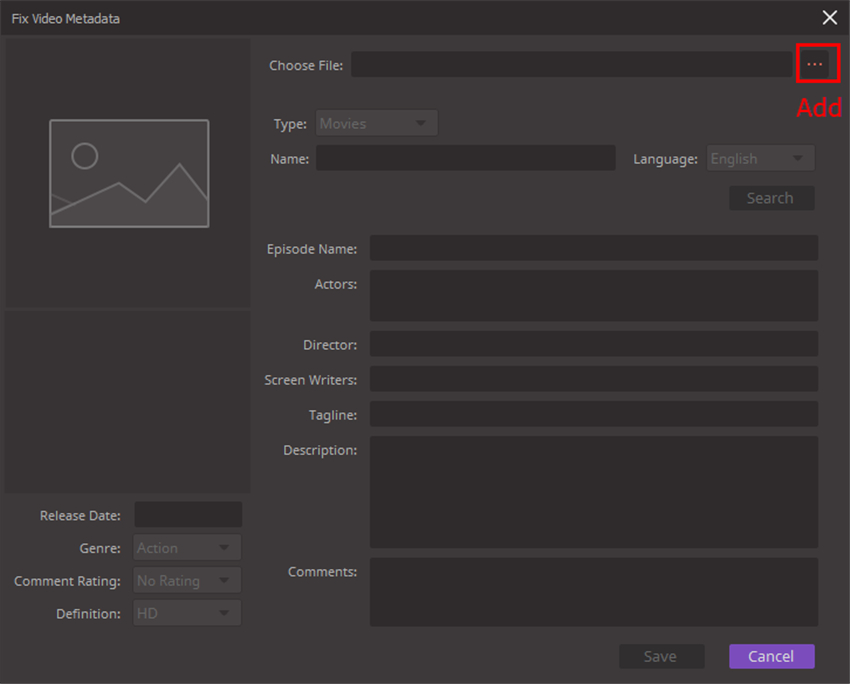
2. When entering the name of the video, ensure that it is correct and does not include any extra words as in “title 1”, etc.
3. Add in the Language and Type of the video as well. The Type should correspond to the iTunes category that you are trying to convert for. If you have selected Movie, once you have completed the conversion you will find the video listed in the Movie section of iTunes.
Tip:Tip: If you select TV Shows, input the Season and Episode number to get accurate metadata information.
4. Click on the Search button and Wondershare Video Converter Ultimate will match the metadata to your video automatically. If the result does not match what you are looking for, you can choose a different option from the other choices on the left side of the window, or you can manually edit the information.
5. Once you have completed editing your metadata information, click on Save and the information will be saved to the converted file.
Tip: To have the converted video along with the metadata information automatically added to your iTunes library, click Menu>Preferences>Convert and check Automatically add files to iTunes library after conversion. Once the conversion is complete, the file will automatically be sent to the correct location of your iTunes library.
Pack Up
How do I crop my video?
The following steps will help you to crop your video.
1. Click Add Files or Load DVD to load the source video into the software.
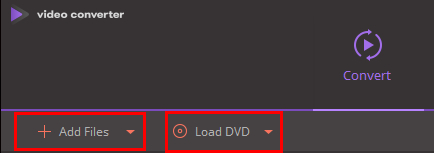
2. Click on the Crop button on the bottom of the file thumbnail.

3. Under Original Preview window, drag the four corners to adjust the cropped size, the part outside of the rectangle is what will be removed. You can also click on the Aspect Ratio to set the size of what you will crop out of the video.

Tip: Once you have clicked on the Crop button, you will also get the option to input the resolution manually. If you choose to not go ahead with the crop that you have set, then click the Cancel button. To save your settings, click on the OK button.
Pack Up
How would I rotate my video?
After the video has been loaded into the software the steps below will allow you to rotate the video as you need.
1. Click on the Crop button on the bottom of the file thumbnail.

2. Go to the Crop tab and use one of the four options to do the rotation that you need. You can rotate the file as follows: Rotate 90 degrees Left, Rotate 90 degrees Right, Flip Horizontally, and Flip Vertically. Clicking on the icon will do the rotation for you, and you will see the rotation in the preview window. After you have your desired rotation completed, close the window to save the settings.
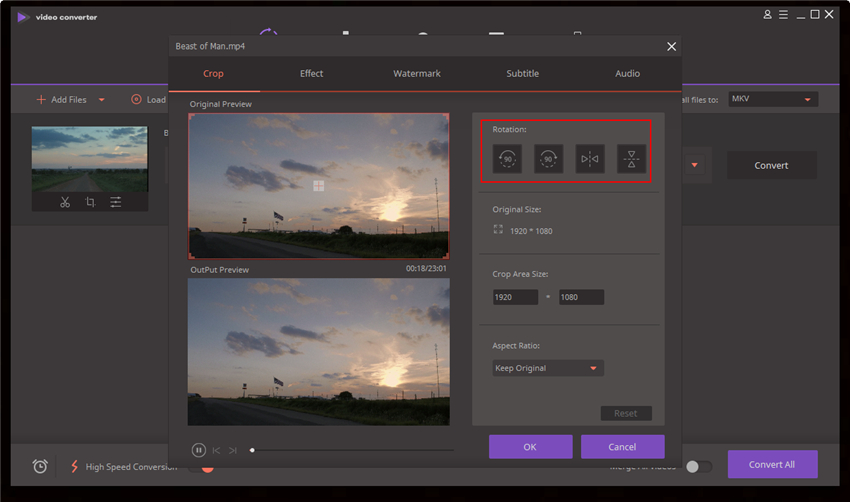
Tip: The changes will be saved once you complete the conversion of the video. Choose the Output Format that you wish to save the file in, and then click the Convert button.
Pack Up
How do I add a subtitle to my video?
Start by adding the file that you wish to add subtitles to via the Add Files or Load DVD buttons.
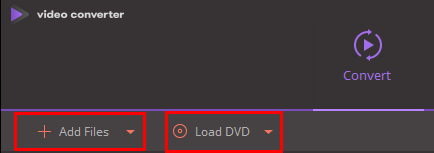
Below you will find the two options for inserting subtitles into the loaded video.
1. Select Add Subtitle from the drop-down list of the Subtitle menu.
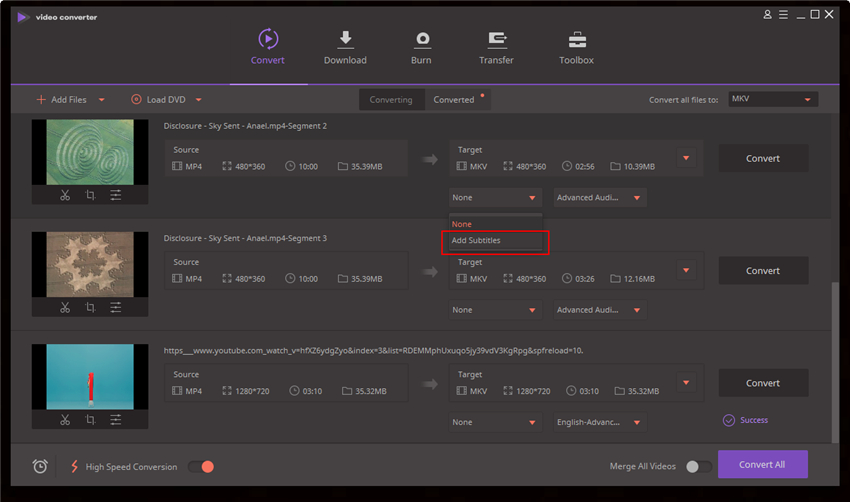
2. After loading the video, click on Crop/Effect on the bottom of the file thumbnail to open the video editing window. Click the Subtitle option and then click the Browse button to locate and load a subtitle file. If you wish to change the font of the subtitles click on the T button. It is also possible to location a subtitle file by clicking on the Search Subtitle option.
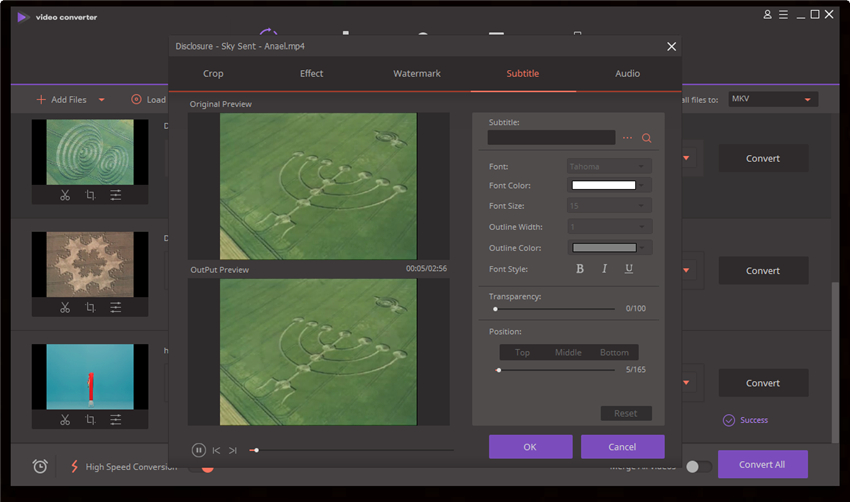
Tip: The subtitle file should be one of the following file types: .srt, .ass, or .ssa
Pack Up
How do I remove the black bars from my converted videos?
The black bars will show up in your converted video if the aspect ratio of the source video and the output video are not the same, or if the media player you have exported to does not share the same ratio. The following steps will explain how to resolve this issue.
1. To maintain the aspect ratio of the source file in your converted file, choose an Target and then click on the Edit button. Here you will want to click on Same as source and it will maintain the aspect ratio of the source file.
Now click on the Crop button on the bottom of the file thumbnail. Here you can choose Keep Original.
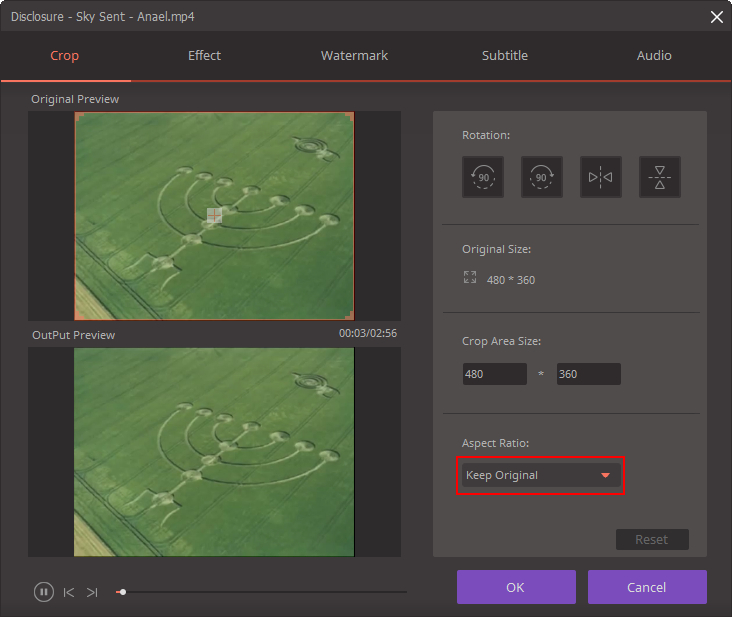
2. If you wish to set a different aspect ratio for the converted video, choose your Output Format and then click on the Edit button to set the resolution you prefer. After you have done that, click on the Crop button to access the Crop window and set Full Screen as your aspect ratio.
Notes:
1. If the source file contains the black bars, you can remove them by selecting the crop tab and then dragging the dashed line to select the video inside the black bars.
If this doesn’t work for you, load the video again and then send us screenshots with the following information so that we can assess the situation and get a solution to you as soon as possible.
1. Right click (right mouse button) the file to choose Source File Information.
2. The Settings window with your chosen options.
3. The Crop window with your chose options.
To take a screenshot, press the PRINTSCREEN key on your keyboard, and the click Start > All Programs > Accessories > Paint, and paste the image to the Paint program by pressing CTRL + V. Next Contact us with the screen shots so that we can help you.
Pack Up


