UniConverter User Guide
-
Video Converter
- Convert DVD to Any Format | Wondershare UniConverter for Windows
- Add Media Files | Wondershare UniConverter for Windows
- Convert Video from Camcorder | Wondershare UniConverter for Windows
- Convert Videos for iPhone/iPad/Android Devices | Wondershare UniConverter for Windows
- Convert Videos for Social Network | Wondershare UniConverter for Windows
- Convert Videos from iOS & Android Devices | Wondershare UniConverter for Windows
- Convert Videos to Any Format | Wondershare UniConverter for Windows
- Convert Video to Audio | Wondershare UniConverter for Windows
- Mute Video | Wondershare UniConverter for Windows
- Add Audio to Video | Wondershare UniConverter for Windows
- Convert Videos to Any Format | Wondershare UniConverter for Mac
- Convert DVD to Video | Wondershare UniConverter for Mac
- Mute Video | Wondershare UniConverter for Mac
- Add Audio to Video | Wondershare UniConverter for Mac
-
Toolbox-all
- Image Converter | Wondershare UniConverter for Windows
- GIF Maker | Wondershare UniConverter for Windows
- Fix Video Metadata | Wondershare UniConverter for Windows
- CD Burner | Wondershare UniConverter for Windows
- Convert CD to MP3 | Wondershare UniConverter for Windows
- Convert Video to VR | Wondershare UniConverter for Windows
- Transfer Video/Audio Files to iOS Device | Wondershare UniConverter for Windows
- Transfer Video/Audio to Android Device | Wondershare UniConverter for Windows
- Transfer Video/Audio to External Hard Drive | Wondershare UniConverter for Windows
- Subtitle Editor | Wondershare UniConverter for Windows
- Watermark Editor | Wondershare UniConverter for Windows
- Smart Trimmer | Wondershare UniConverter for Windows
- Transfer | Wondershare UniConverter for Mac
- Image Converter | Wondershare UniConverter for Mac
- GIF Maker | Wondershare UniConverter for Mac
- Fix Media Metadata | Wondershare UniConverter for Mac
- CD Converter | Wondershare UniConverter for Mac
- CD Burner | Wondershare UniConverter for Mac
- VR Converter | Wondershare UniConverter for Mac
- Subtitle Editor | Wondershare UniConverter for Mac
- Watermark Editor | Wondershare UniConverter for Mac
- Smart Trimmer | Wondershare UniConverter for Mac
- Intro & Outro | Wondershare UniConverter
- Intro & Outro | Wondershare UniConverter for Mac
- Auto Reframe Video | Wondershare UniConverter
- Auto Reframe Video | Wondershare UniConverter for Mac
- AI Portrait | Wondershare UniConverter
- AI Portrait | Wondershare UniConverter for Mac
- Background Remover | Wondershare UniConverter for Windows
- Background Remover | Wondershare UniConverter for Mac
FAQs
Add media files
To start converting media files, you need to add them to Wondershare UniConverter (originally Wondershare Video Converter Ultimate) firstly. There are different methods to add files.
Add Media Files - Wondershare UniConverter (Win) User Guide
Method 1: Add media files by buttons.
Click the Document icon in the top-left corner of the window directly, or click the inverted triangle icon beside it and select one of the buttons from the drop-down list to add files from different sources.
1. Add Files: You can add all the files on your PC from here.
2. Add Folder: You can add all the files in one folder from here.
3. Add from Device: You can add files from the connected device.
4. Add from Camcorder: You can add files from the connected camcorder.
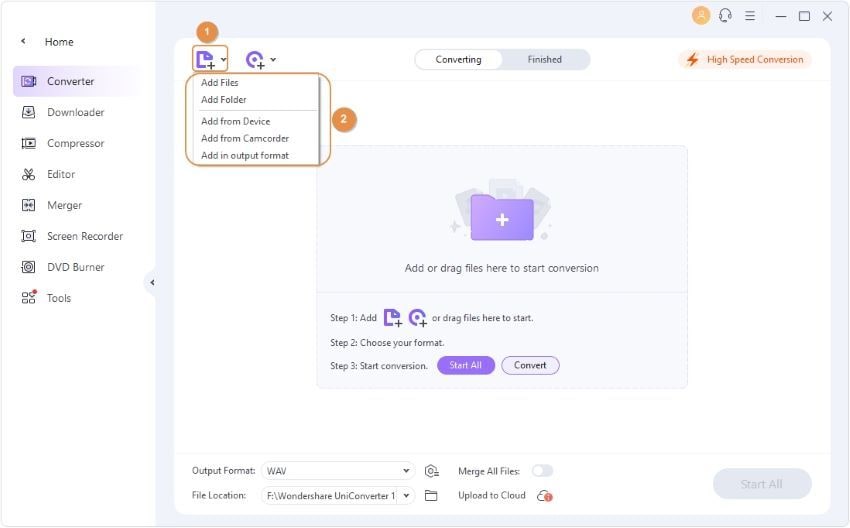
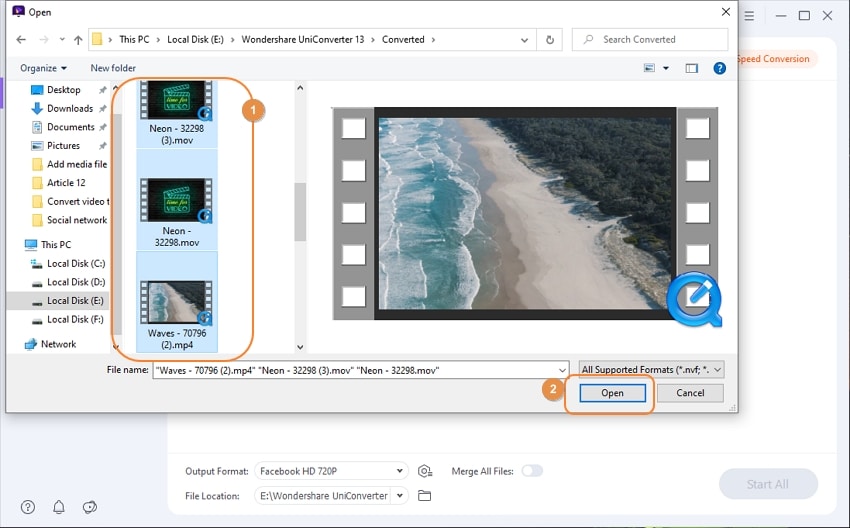
Situation 1: A File Explorer window will pop up if you click Add Files or Add Folder. Find and select the files you want to convert and click Open to add them to the conversion queue.
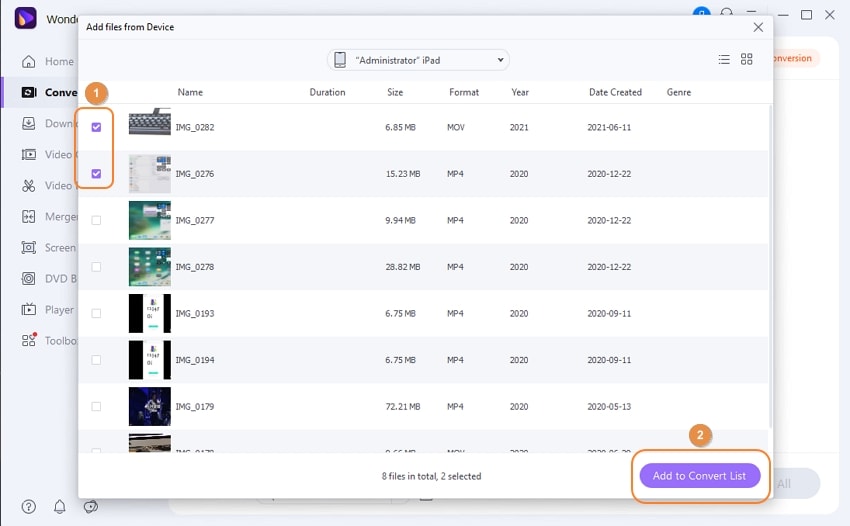
Situation 3: A Add files from Device window will open if you click Add from Device or Add from Camcorder. Find and select the files you want to convert, and click Add to Convert List to add them to the conversion queue.
Method 2: Add media files by drag and drop.
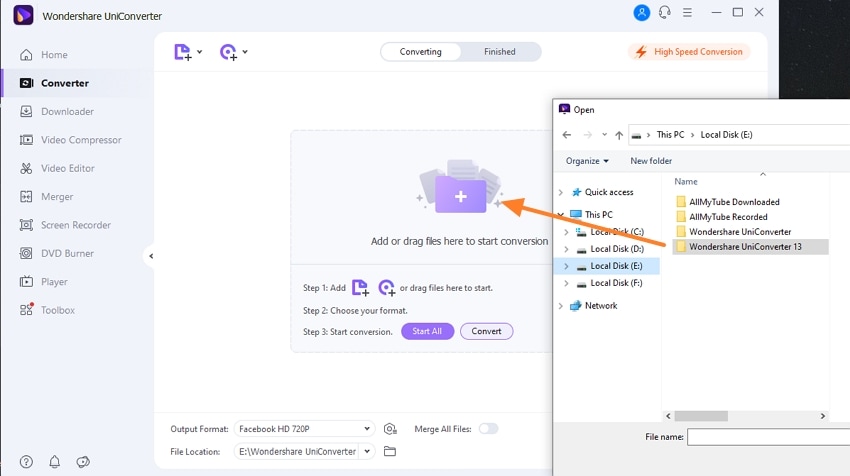
Drag the media files you want to convert from the File Explorer window and drop the files into the conversion queue of Wondershare UniConverter (originally Wondershare Video Converter Ultimate).
Introduction of the conversion list.
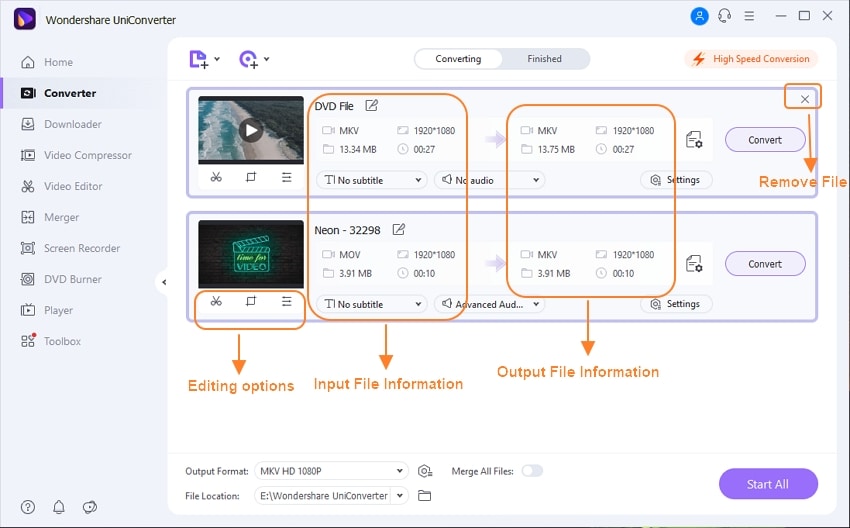
After you have added the files, they will appear in the conversion list. Here, you can view the information about the files, choose audio and subtitle tracks, and manage the output file. On the left side, you can see the input files' media information and the editing section, and on the right side, you can manage the output files' format and presets.
To remove a file from the list, click the X button at the top-right corner of the file.