UniConverter User Guide
FAQs
Convert audio files on Mac
It is not necessary that your music player program or device would support all the audio files that you have. Besides, there might also be instances when you need a soundtrack in a different extension rather than the globally accepted MP3. In either case, if you own a Mac computer, Wondershare UniConverter for Mac allows you to convert any music file to your preferred format using the following simple steps:
How To Convert Audio Files on Mac-Wondershare UniConverter (Mac) User Guide
Step 1 Import audio track.
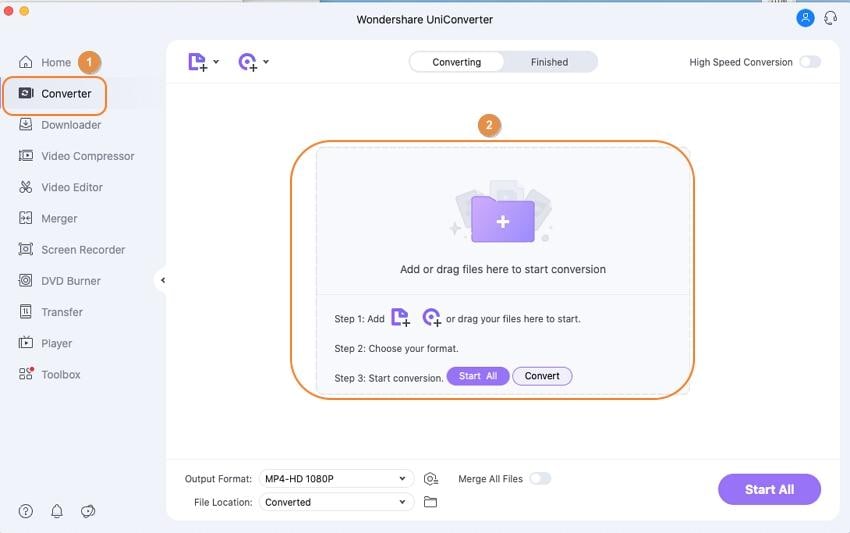
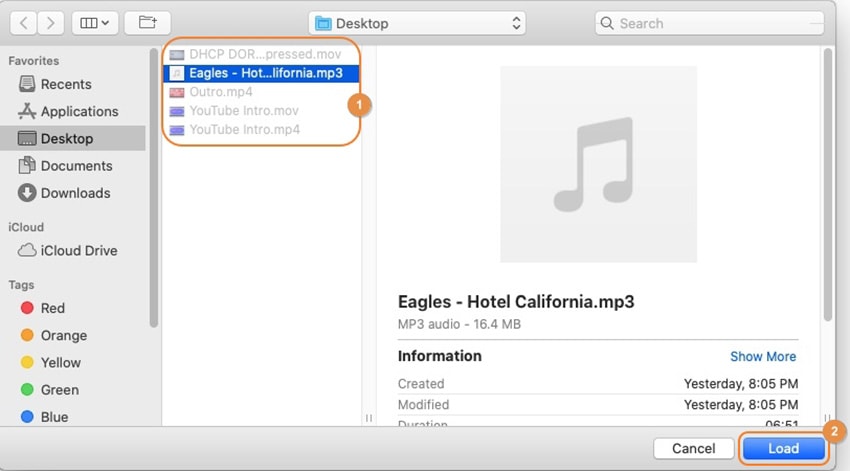
Launch Wondershare UniConverter on your Mac computer, go to the Converter category from the list in the left pane, click Add Files from the right, use the box that comes up to select the audio file you want to convert, and click Load from the bottom-right corner.
Step 2 Choose an output format.
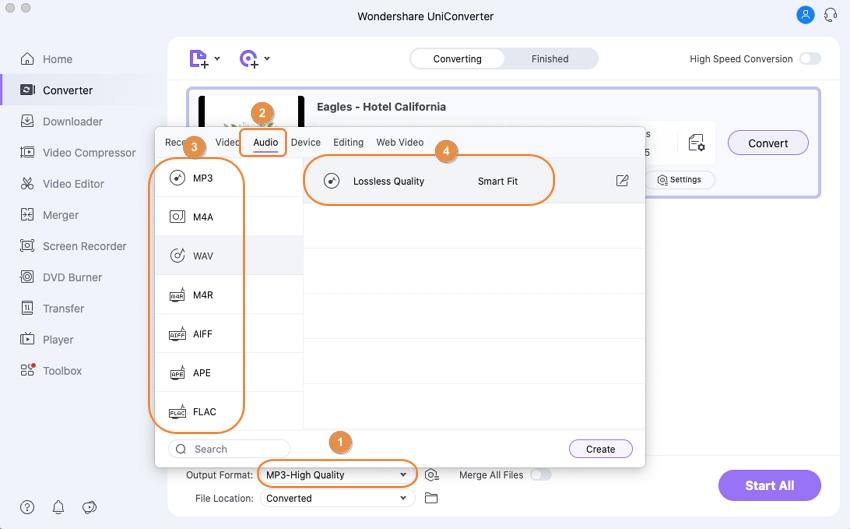
Click to open the Output Format menu from the lower section of the interface, go to the Audio tab if not already there, select your preferred format from the list on the left, and click an appropriate quality from the right.
Step 3 Convert the audio.
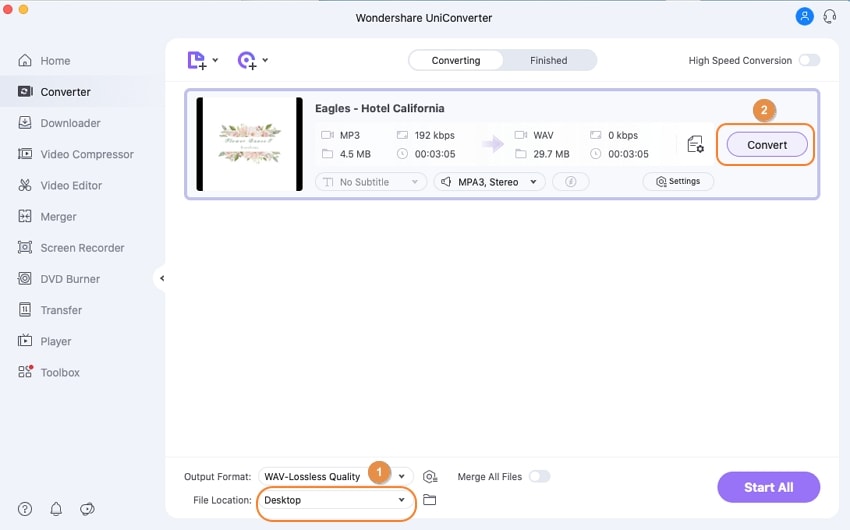
Select an output folder in the File Location field at the bottom, and click Convert to convert the audio file to the selected format. Note: In case you added multiple files, you must click Start All from the bottom-right corner for batch conversion.
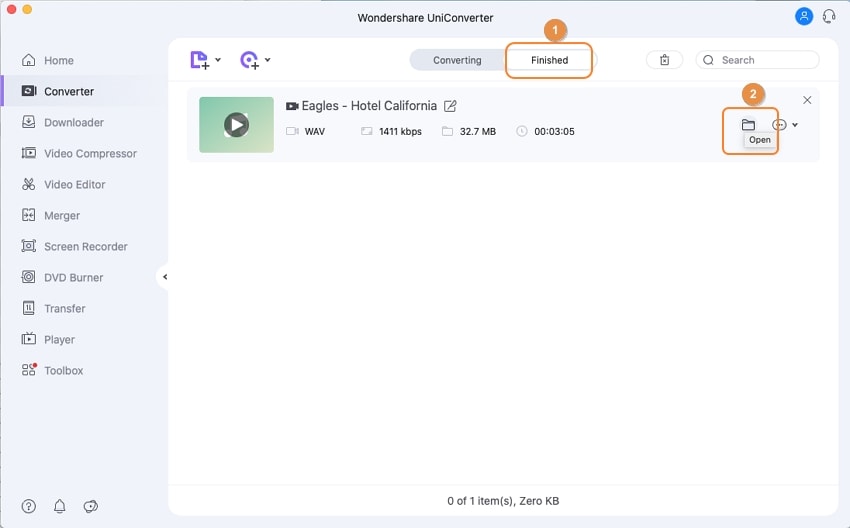
Step 4 Access the converted audio files.
Go to the Finished tab from the top, and click Open from the right of the converted file to go to the output folder to access the newly produced audio track.

 print
print