UniConverter User Guide
FAQs
Download video tips
To offer you a better and quick downloading experience, here are a few tips for downloading, as enlisted below.
- Part 1. Download preference setting
- Part 2. Accelerate download speed
- Part 3. Priority setting for download
- Part 4. Enable Download then Convert Mode
- Part 5. Booking download time
- Part 6. Manage downloaded video
Part 1. Download preference setting
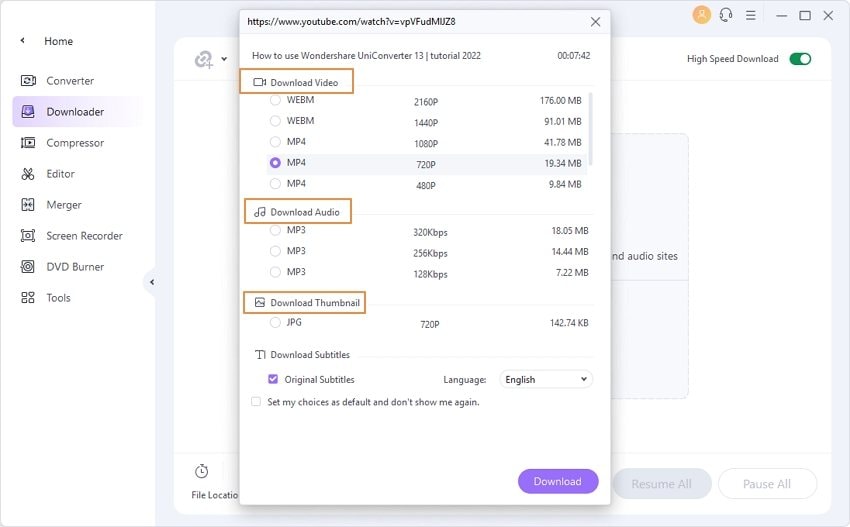
After copying the video URL to be downloaded, click on the button at the upper-left corner, and a pop-up dialog window will open for you to choose our download preferences.
- Under the Download Video or Download Audio tab, you can select the format in which you want your videos to be downloaded. Next to the format, the resolution/audio bitrate, as well as the corresponding file size, also appears. If you require to download only the thumbnail of the video link, chooses the Download Thumbnail option.
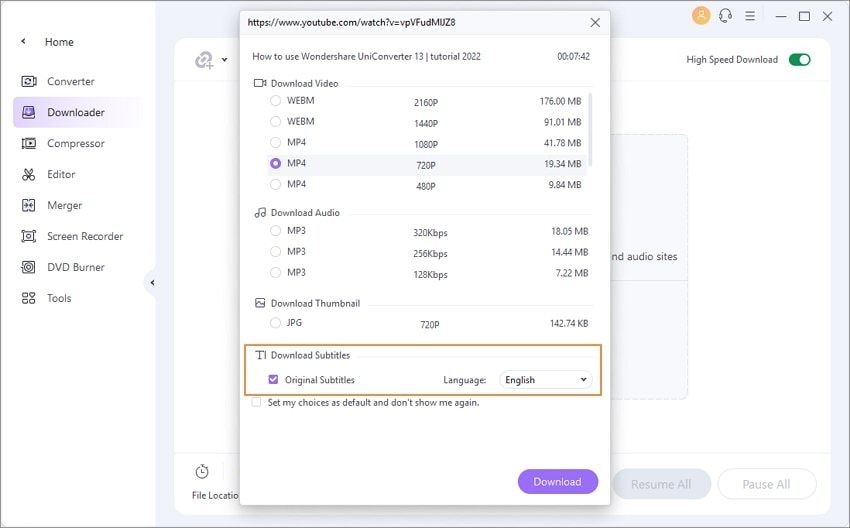
- If the videos have subtitles, you can choose to download the Original Subtitles. Though the system language for the subtitles is selected by default, in case if you want to change, you can choose from the drop-down list at Language.
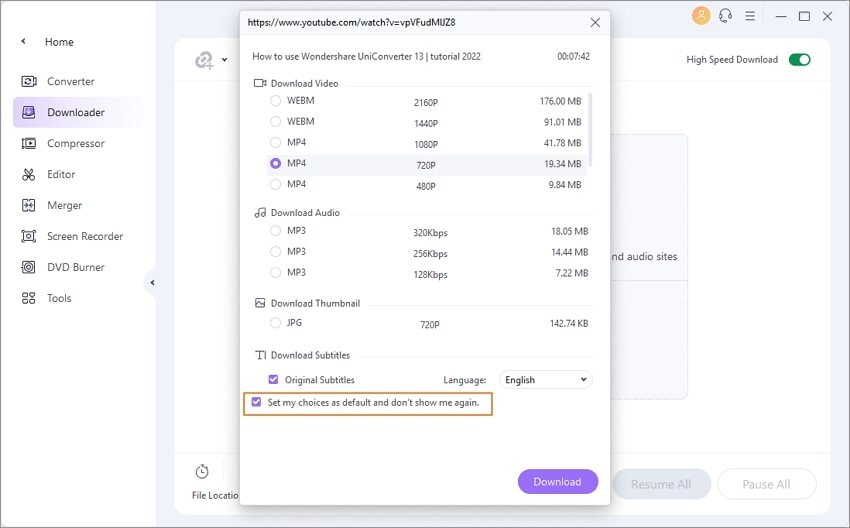
- The selected download preferences can be set as the default option by enabling the check-box at Set my choices as the default and don’t show me again option. So next time, when you click on the button, this setting dialog window will not appear, and the download process will start immediately.
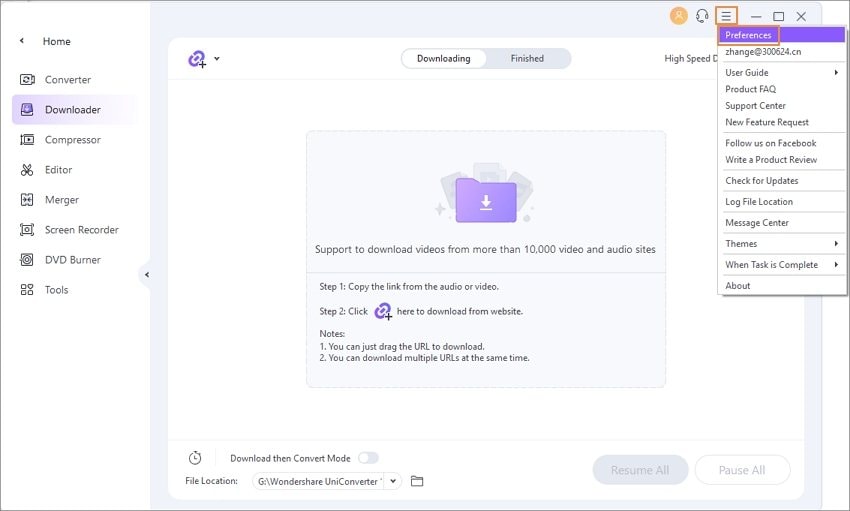
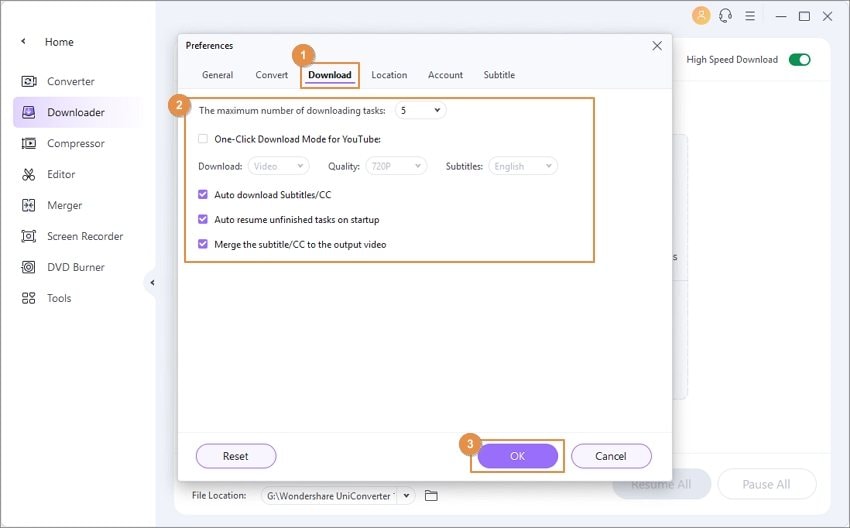
- To recover the pop-up window or change the download preferences, you need to open the Preferences option from the top-right corner at the main interface and then select the Download tab. Here uncheck the One-Click Download Mode for the YouTube option and click on the OK button to confirm the new setting.
This Download Preferences window can also be used to set the maximum number of downloading tasks at a time (1-10), auto-downloading of subtitles, auto resuming the unfinished tasks on startup, merging the subtitles to the output video, default subtitle language, and default quality as well.
Click on the OK button to confirm the settings while click on the Reset button to move back to the original settings.
Part 2. Accelerate download speed
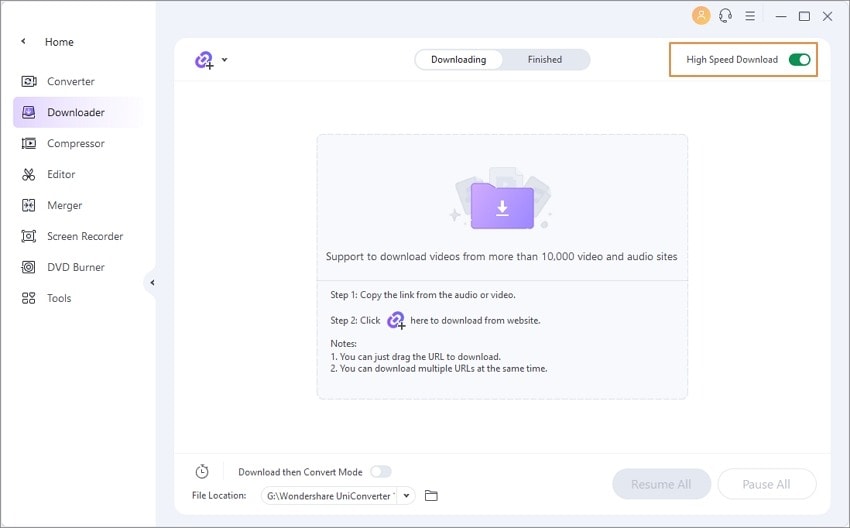
There is a high-speed download option at the software that makes the downloading process 3 times faster. The option can be used before the download process or during the download process.
To enable the function, turn on the High Speed Download button at the top-right corner of the Downloader interface.
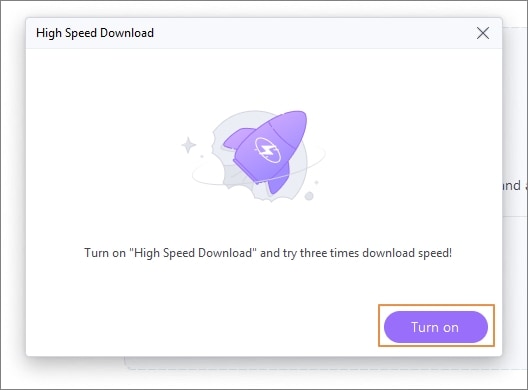
A pop-up window will appear where you need to click on the Turn On button to enable the function.
Part 3. Priority setting for the download
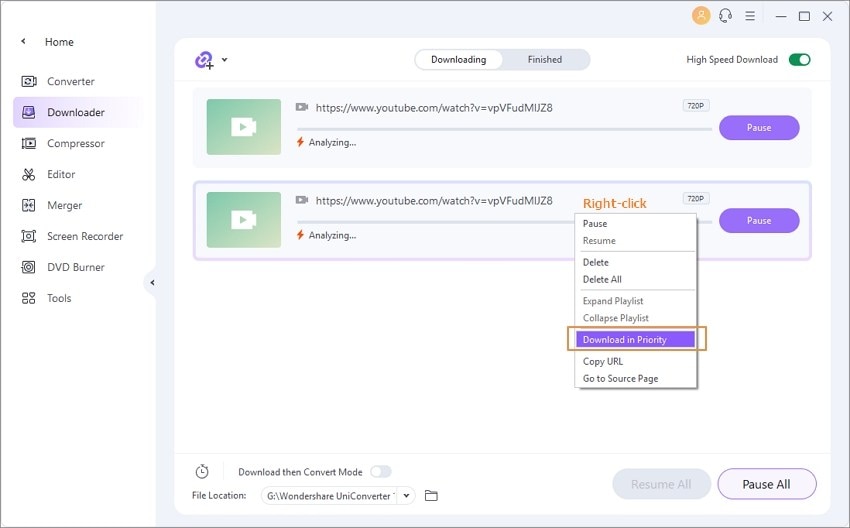
The software allows downloading up to 10 files at a time. And by default, the order of downloading is the same in which the files are added to the interface. So in case if you want to download any particular file, you can give a preference, and the selected file will move to the top of the list of downloads.
After you have added multiple video links to the interface for downloading, select the one which is your preference, right-click and choose Download in Priority option. The selected video will move to the top of the list.
Part 4. Enable Download then Convert Mode
By default, the videos are downloaded in their original format by the software. If you require to download the files in any particular format, you can enable the Download then Convert Mode on.
Before starting the downloading process, click on the Download then Convert Mode option at the bottom-right corner. A pop-up window will appear showing the list of supported video, audio, and Device formats. Choose the desired option and also the output file quality from the list.
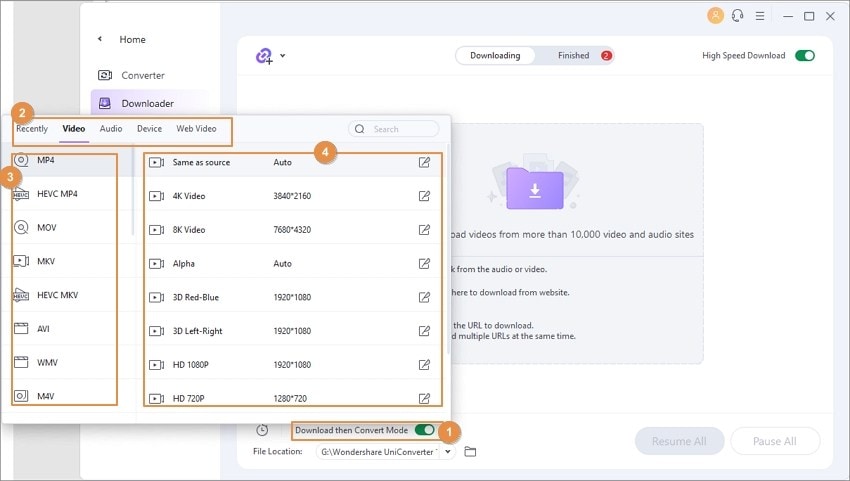
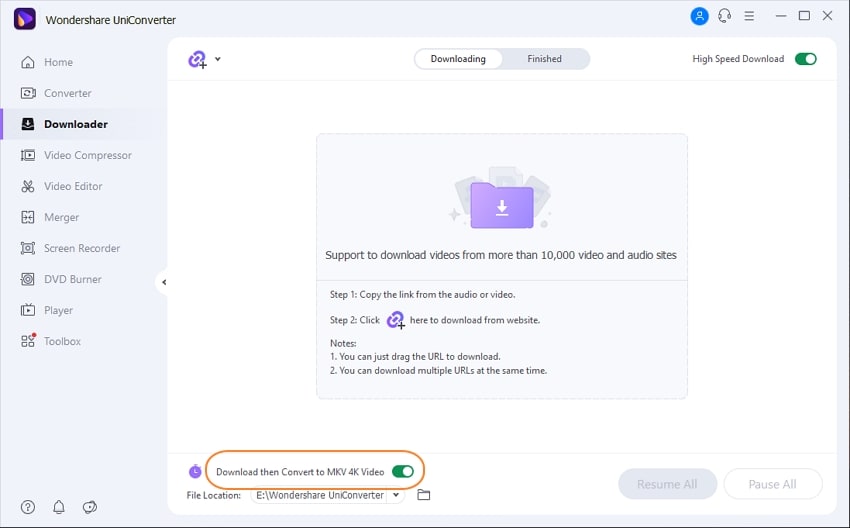
The selected format will now appear with the Download then Convert Mode option. Start downloading the videos, and they will be automatically downloaded in the selected format.
Part 5. Booking download time
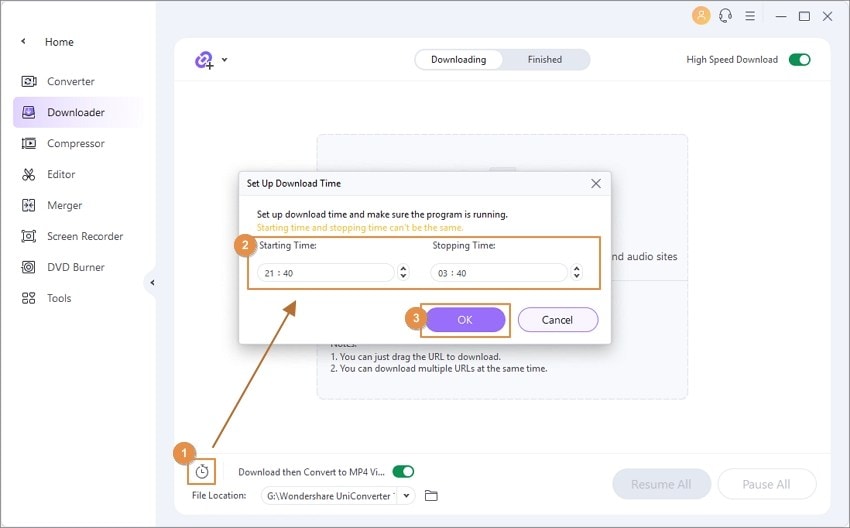
If you need to set the downloading time, the software has an option where you can set the start and the stop time.
At the bottom-left corner, click on the clock icon, and a pop-up Booking download time window will open. Here enter the Start Download and the Stop Download time. You can either enter the time manually or move the up and down arrows. To make the function work, you must be ensured that the program is working.
Part 6. Manage downloaded video
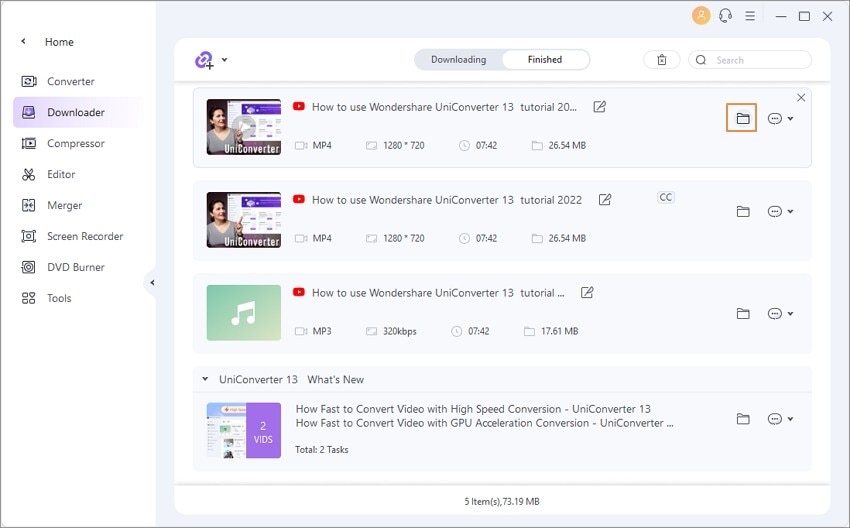
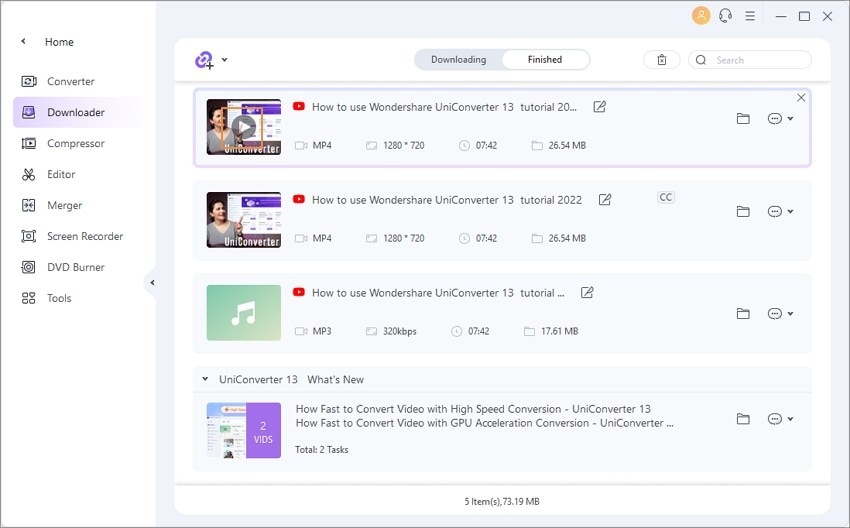
The videos downloaded can be checked as well as managed from the Finished tab on the interface.
Click on the Finished tab, and the list of all the downloaded videos will appear along with their thumbnail image and other details. The icon next to the downloaded video name will let you rename the downloaded file.
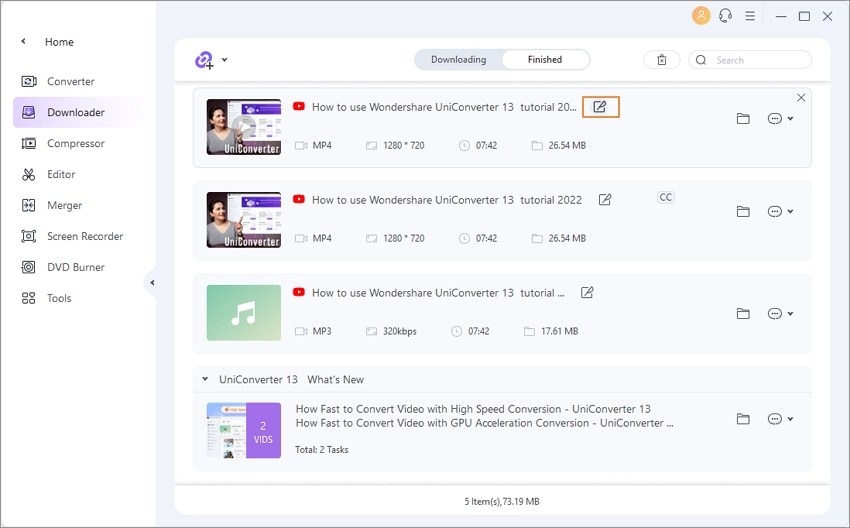
Clicking on the Open button will open the downloaded file location on your system.
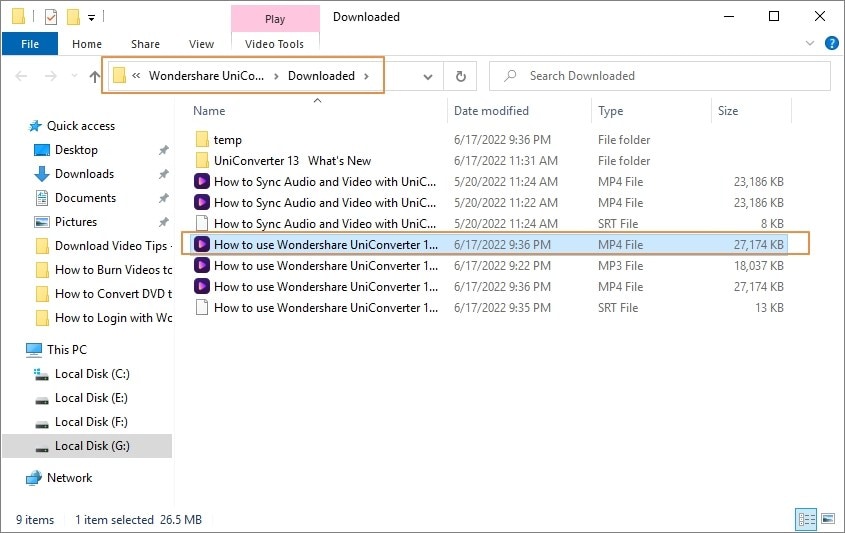
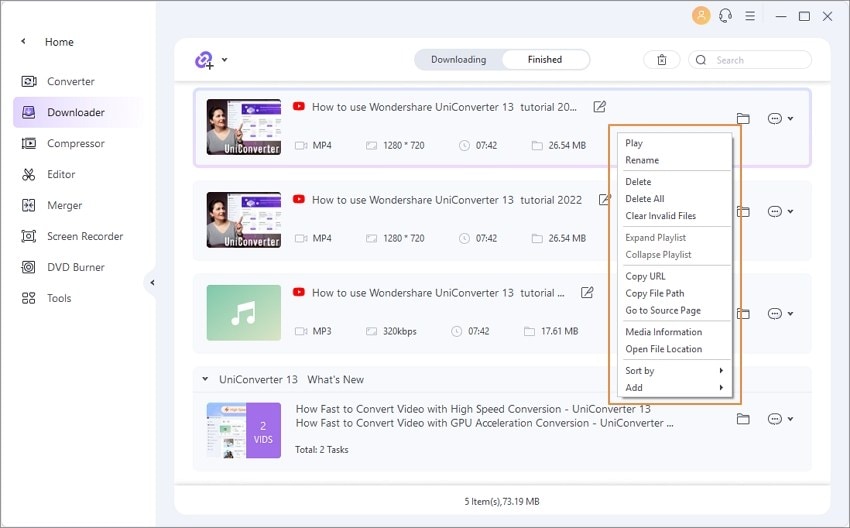
Right-click the video, and you will find several other options to manage the file like Play, Delete, Open File Location, and more.
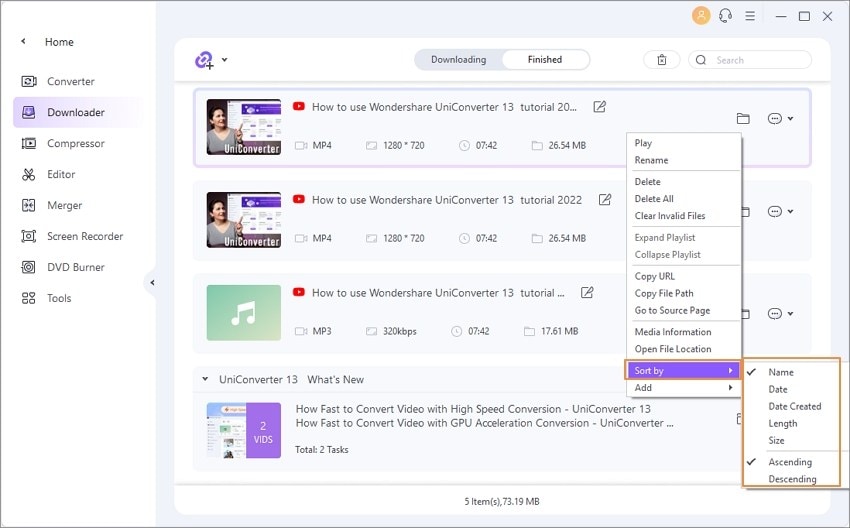
Right-click the video and choose the Sort by the option, and the downloaded files can be sorted by the length, size, name, ascending, and descending order.
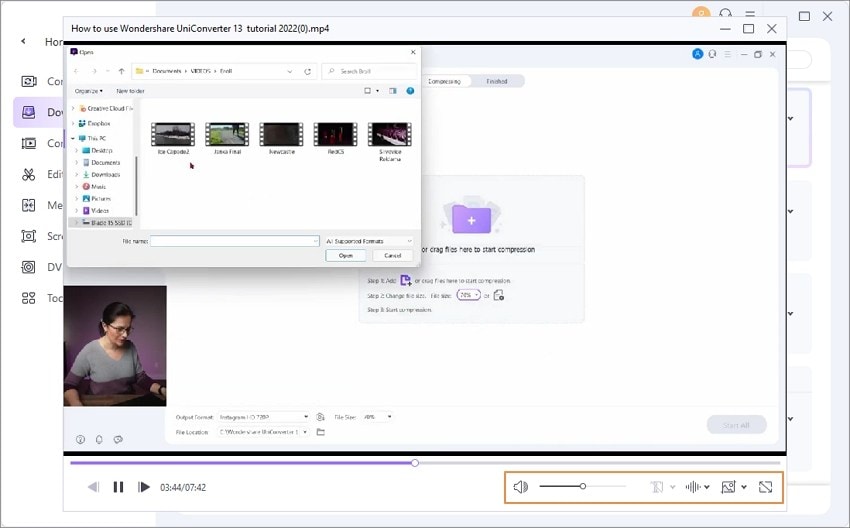
Move the mouse over the desired downloaded video, and a play icon will appear. Click on the icon, and the downloaded file will open in the new player window and start playing. The built-in player window also lets you rewind, forward, change volume, use subtitles, use audio tracks, and also capture the screen.

 print
print