UniConverter User Guide
FAQs
Subtitle Editor - How to Add and Edit Subtitles Easily
Wondershare UniConverter has added a new useful feature to its Toolbox section where users can create new subtitles for videos, online search subtitles, local import subtitles to videos, and edit subtitles. A detailed guide to using the function is given below.
Part 1. Create Subtitles - How to Add Subtitle to Video Easily
Part 2. Import and Auto Generate Subtitles - How to Import or Auto Generate and Edit Video Subtitle
Part 1. Create Subtitles - How to Add Subtitle to Video Easily
Want to add subtitles to the video? How to create custom .srt files for videos? Follow the below steps to create and add subtitles to your video files without any hassle.
Step 1 Launch Wondershare UniConverter and open the Subtitle editor.
Open the installed software on your system, and from the Toolbox section, click on the Subtitle Editor option.

Step 2 Import video to add subtitle.
A new pop-up window will open where you need to add the video to which the subtitle is to be added. Click on the + sign or Add Files button to browse and add the video.

Step 3 Add subtitle to the video.
After the file is added, you will see 3 options under the video - New, Import, and Auto-Subtitle Generator. Click on the New option to create a custom .srt file.

The interface will now show the selection of the video for the first 3 seconds. The desired subtitle content for this first 3 seconds can be added from the space provided on the right-hand side of the window.

Step 4 Edit the subtitle
- By default, the software chooses 3 seconds for the subtitle, but if you want for a longer or a shorter time, you can edit it by selecting the Start Time and the End Time.
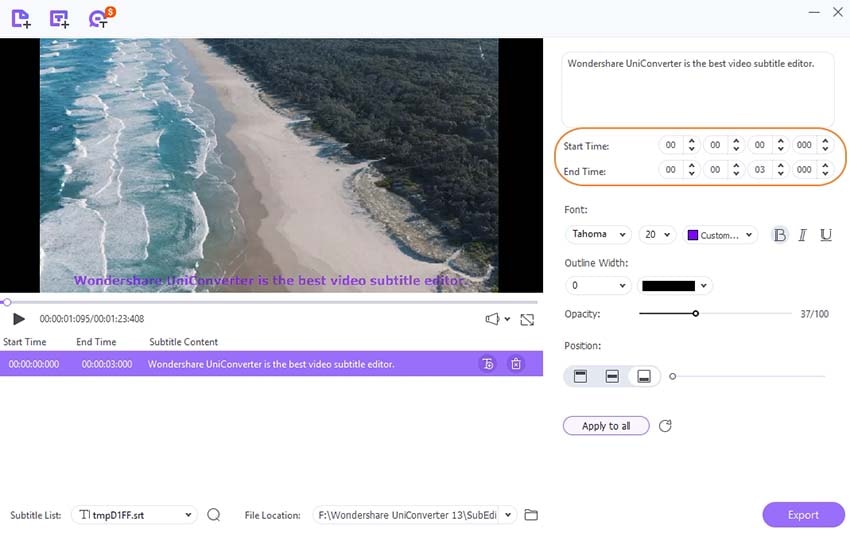
- After the subtitle content is added, you can choose its Font, Size, Color, Bold, Italics, and Underline option from the right-side panel.

- The Outline width of the subtitle as well the color can be selected as needed.
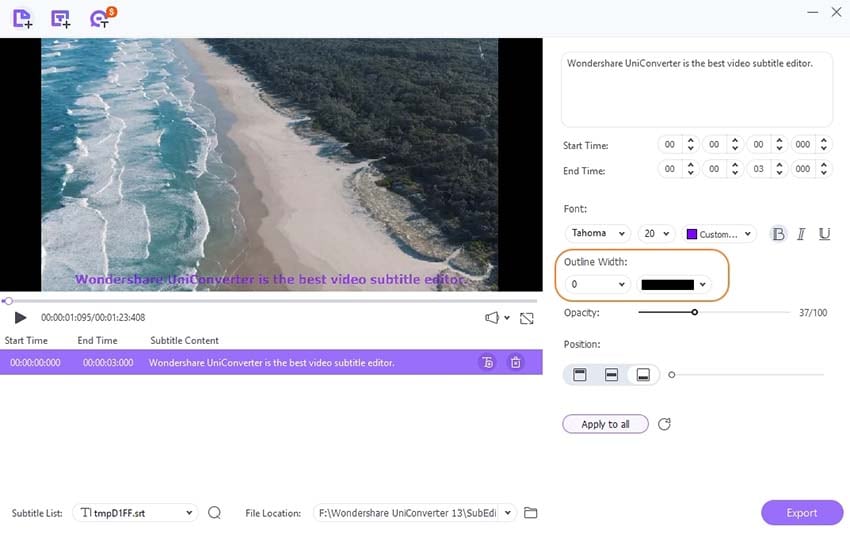
- Next, choose the Opacity by dragging the bar as needed. The higher the Opacity, the more visible the subtitle becomes.
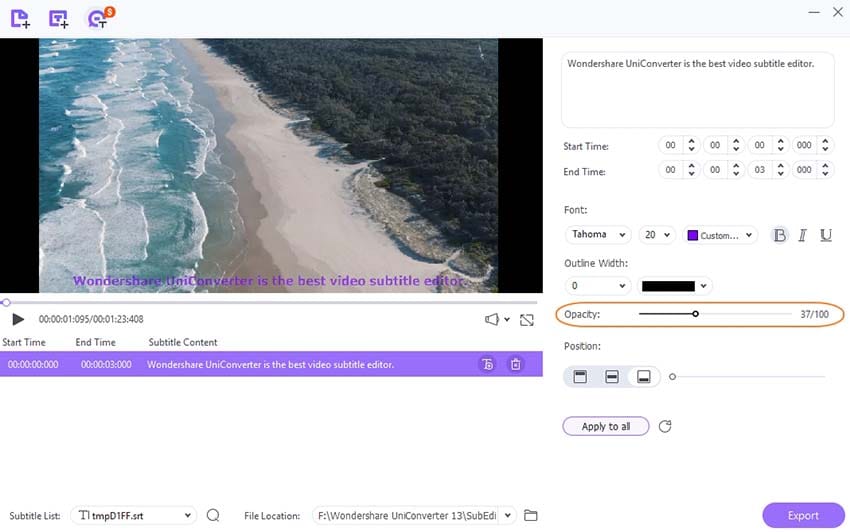
- At the Position tab, you can select the placement of the subtitle at the Upper, Middle, or Lower section of the video. You can also drag the bar next to the selected position to further choose the exact placement.

- Click on Apply to all if you want similar settings for all subtitles. Click on the Reset icon to reset the changes.

Step 5 Add more subtitles.
Once the first subtitle is added, you can add the next one by clicking on the T+ sign on the left side under the video. Again, by default, a subtitle will be selected for 3 seconds. If you want to select any subtitle, click on the delete icon.
Similarly, multiple subtitles for the video as needed can be added. Editing for each subtitle can separately be done as stated in the above Step 4.

Step 6 Save Subtitles
After all the subtitles are added to the video, the Subtitle List tab will show the type of subtitle added. Choose the desktop folder to save the processed video at the File Location tab. Finally, click on the Export button to start processing and added subtitles to the video.

Tips:
If you want to add two or more .srt files to your video, you can click on the T+ sign on the left side under the video to import a local .srt file after finishing the custom one.

It will remind you to save your current editing. Click the Yes button to save if you don’t want to lose the edit subtitles.
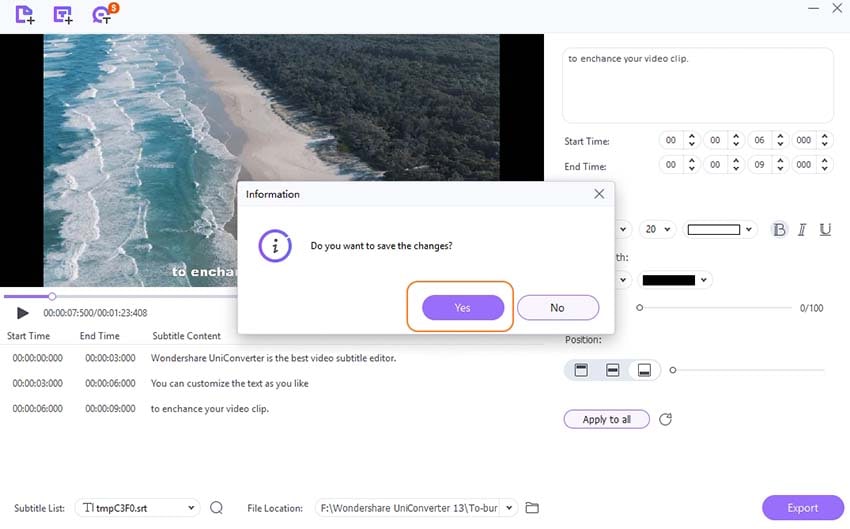
Then you will find the newly added subtitle showing on the panel.
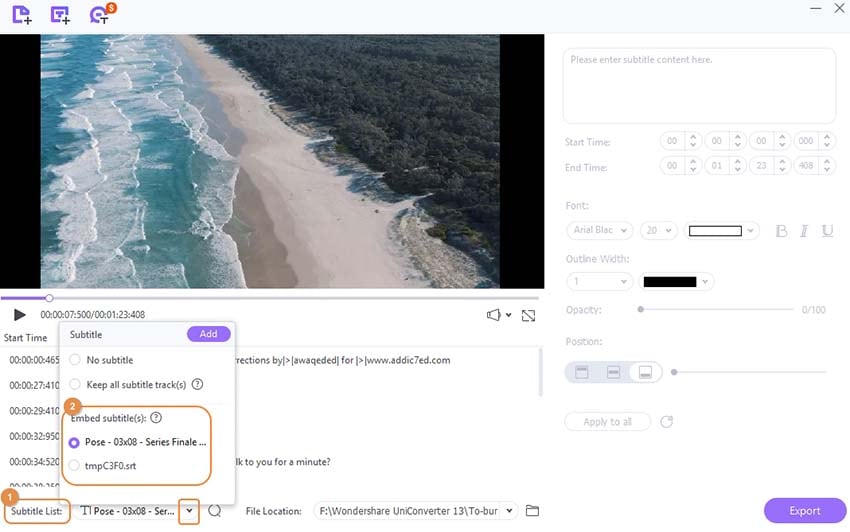
Click the down arrow sign beside the Subtitle List option. You can find there are 2 embedded subtitle files that you can switch to edit.
Part 2. How to Import and Edit Video Subtitle or Auto Generate Subtitle
Using Wondershare UniConveter, the subtitle saved on your system can be quickly added to the desired video using the Import function. Listed below are the steps for the same.
Step 1 Choose the Subtitle Editor feature and add the video.
Download, install and run the Wondershare UniConverter software and from the Toolbox section, select the Subtitle Editor option. Add the video for which the subtitle has to be selected by clicking on the + sign or the Add Files icon.
Step 2 Choose to Import the subtitle.
Click on the Import button under the video image, and the software will let you browse and add the locally saved subtitle file.

Tips:
If you hope to add subtitle effortlessly, you can try the feature of Auto-Subtitle Generator in Wondershare UniConverter. Its smart voice recognition function will directly and accurately transfer the audio in the video into words.

Step 3 Edit the Subtitle.
After the subtitle is added, you can customize and edit them as needed.

- Select the subtitle Font, Size, and Color. You can choose them to be Bold, Italics, or Underline as needed.
- Next, choose the Outline Width ranging from 1-10 and also the desired color for the outline.
- The Opacity of the subtitle can be selected by dragging the bar.
- Under the Position section, select if you want to place your subtitle at the top, bottom, or lower side of the video. You can move the subtitle at the selected position by dragging the bar.
- Clicking on Apply to all will use the same settings for all other subtitles, while clicking on Reset will undo all the changes.
Step 4 Save subtitles.
The File Location tab will let you choose the desktop folder to save the processed files. Click on the Export button at the bottom-right corner to start processing and added the subtitles to the file.

 print
print