UniConverter User Guide
FAQs
How to make GIF files
GIF files are popular for featuring animated images and text much like a video, and the tutorial below would tell you how to make GIFs in 3 simple steps with the GIF Maker.
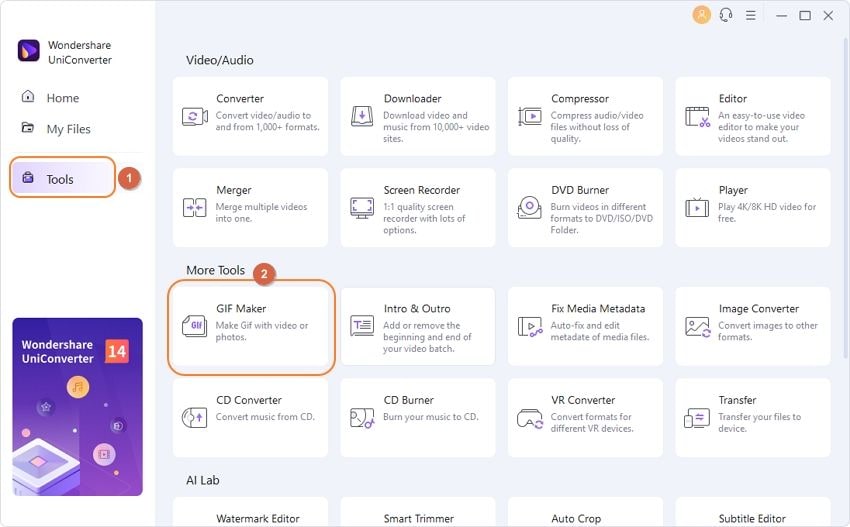
Open the Wondershare UniConverter software on your system, and the list of the main functions appear on the left side of the main interface. Choose Toolbox > GIF Maker option.
A new window will now appear showing you the options to convert Photos to GIF or Videos to GIF. Choose the Photos to GIF option.
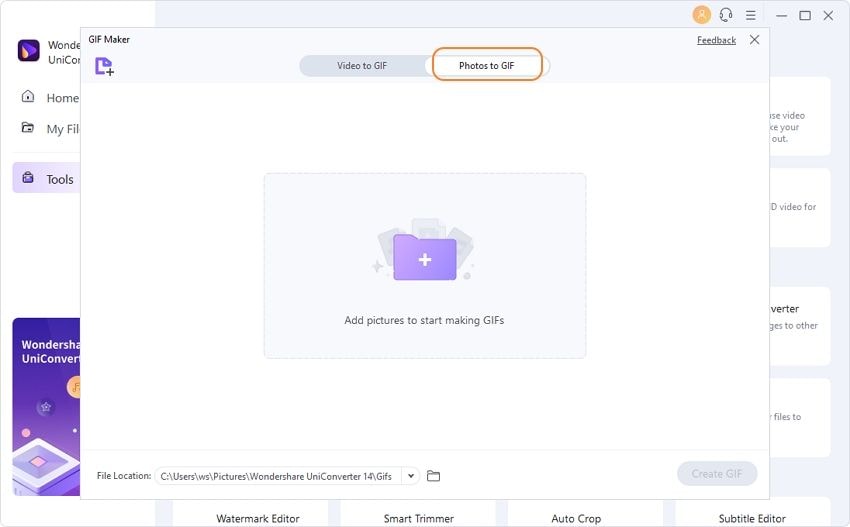
How to Make GIF Files - Wondershare UniConverter (Win) User Guide
Part 1. Convert Photos to GIF
Supported Input image Formats for Windows: JPG, JPEG, PNG, and BMP
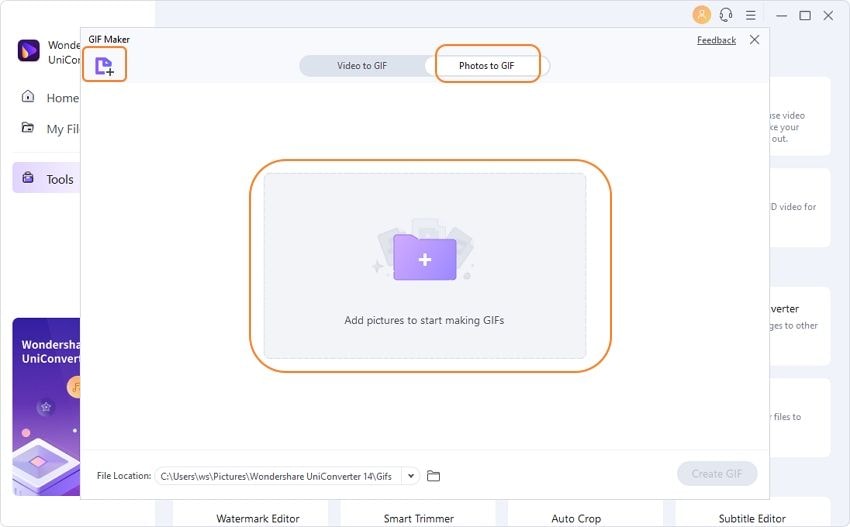
Step 1 Add Photos to the software.
Click on the + icon at the center or the  button at the top left corner of the window to browse and load the image from your computer.
Step 2 Set GIF preference.
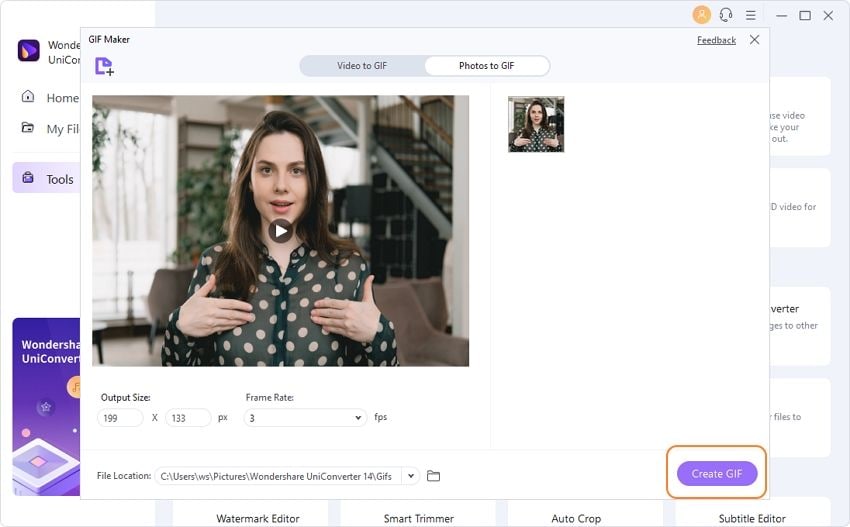
Set the output size, frame rate, and file location in the bottom-left area.

Step 3 Create GIF.
Click Create Gif button to start converting photos to GIF.
Part 2. Turn Video to GIF
Supported Input Video Formats for Windows: MP4, M4V, AVI, MOV, 3GP, MPEG, MPG, DAT, ASF, WMV, VOB, MKV, and 3GS.
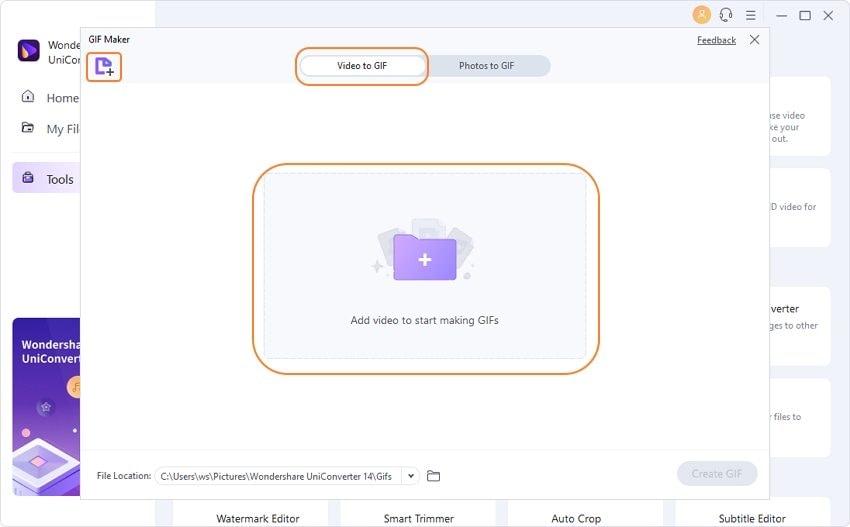
Step 1 Add Video to the interface.
Switch to Video to GIF tab and then click on the + sign or the  button at the top-left corner to import the video for which you need to create a GIF.
Step 2 Select the video clip.
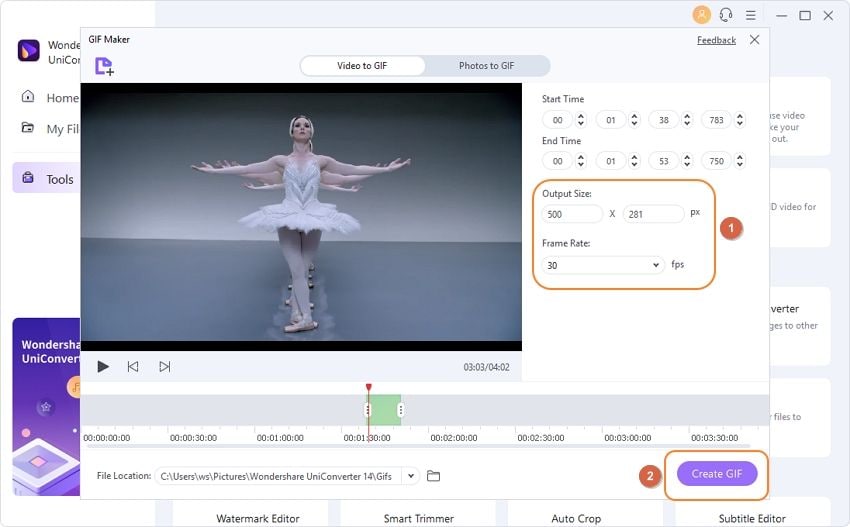
Select the video clip that you want to turn to GIF. You can either enter the specific start/end time into the blank or drag the side lay under the video.

Step 3 Set GIF preference and create GIF.
Set the output size, frame rate, and file location as you need and click Create Gif to proceed.
Now you’ve made your GIFs! Share with your friends and impress them right away.

 print
print