UniConverter User Guide
-
Video Converter
- Convert DVD to Any Format | Wondershare UniConverter for Windows
- Add Media Files | Wondershare UniConverter for Windows
- Convert Video from Camcorder | Wondershare UniConverter for Windows
- Convert Videos for iPhone/iPad/Android Devices | Wondershare UniConverter for Windows
- Convert Videos for Social Network | Wondershare UniConverter for Windows
- Convert Videos from iOS & Android Devices | Wondershare UniConverter for Windows
- Convert Videos to Any Format | Wondershare UniConverter for Windows
- Convert Video to Audio | Wondershare UniConverter for Windows
- Mute Video | Wondershare UniConverter for Windows
- Add Audio to Video | Wondershare UniConverter for Windows
- Convert Videos to Any Format | Wondershare UniConverter for Mac
- Convert DVD to Video | Wondershare UniConverter for Mac
- Mute Video | Wondershare UniConverter for Mac
- Add Audio to Video | Wondershare UniConverter for Mac
-
Toolbox-all
- Image Converter | Wondershare UniConverter for Windows
- GIF Maker | Wondershare UniConverter for Windows
- Fix Video Metadata | Wondershare UniConverter for Windows
- CD Burner | Wondershare UniConverter for Windows
- Convert CD to MP3 | Wondershare UniConverter for Windows
- Convert Video to VR | Wondershare UniConverter for Windows
- Transfer Video/Audio Files to iOS Device | Wondershare UniConverter for Windows
- Transfer Video/Audio to Android Device | Wondershare UniConverter for Windows
- Transfer Video/Audio to External Hard Drive | Wondershare UniConverter for Windows
- Subtitle Editor | Wondershare UniConverter for Windows
- Watermark Editor | Wondershare UniConverter for Windows
- Smart Trimmer | Wondershare UniConverter for Windows
- Transfer | Wondershare UniConverter for Mac
- Image Converter | Wondershare UniConverter for Mac
- GIF Maker | Wondershare UniConverter for Mac
- Fix Media Metadata | Wondershare UniConverter for Mac
- CD Converter | Wondershare UniConverter for Mac
- CD Burner | Wondershare UniConverter for Mac
- VR Converter | Wondershare UniConverter for Mac
- Subtitle Editor | Wondershare UniConverter for Mac
- Watermark Editor | Wondershare UniConverter for Mac
- Smart Trimmer | Wondershare UniConverter for Mac
- Intro & Outro | Wondershare UniConverter
- Intro & Outro | Wondershare UniConverter for Mac
- Auto Reframe Video | Wondershare UniConverter
- Auto Reframe Video | Wondershare UniConverter for Mac
- AI Portrait | Wondershare UniConverter
- AI Portrait | Wondershare UniConverter for Mac
- Background Remover | Wondershare UniConverter for Windows
- Background Remover | Wondershare UniConverter for Mac
FAQs
How to record webcam on mac
If you have a webcam built-in or externally connected to your Mac computer, Wondershare UniConverter can access and use it to capture your movements. This approach comes in handy when you are in the process of preparing interactive videos for your interns, colleagues, students, etc., and want to explain certain concepts or scenarios using your facial expressions and body language. Here is how you can use Wondershare UniConverter to record footages of yourself with a webcam:
How To Record Webcam On Mac-Wondershare UniConverter (Mac) User Guide
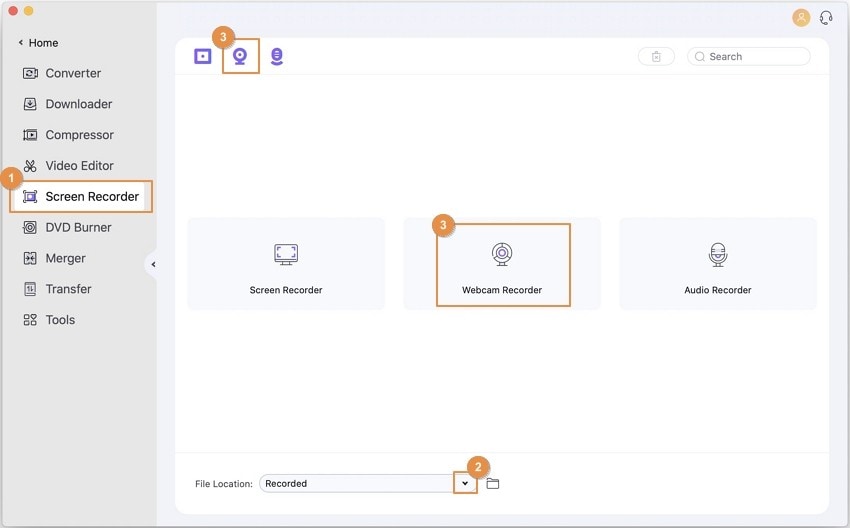
Step 1 Set the default save location and launch the webcam recorder.
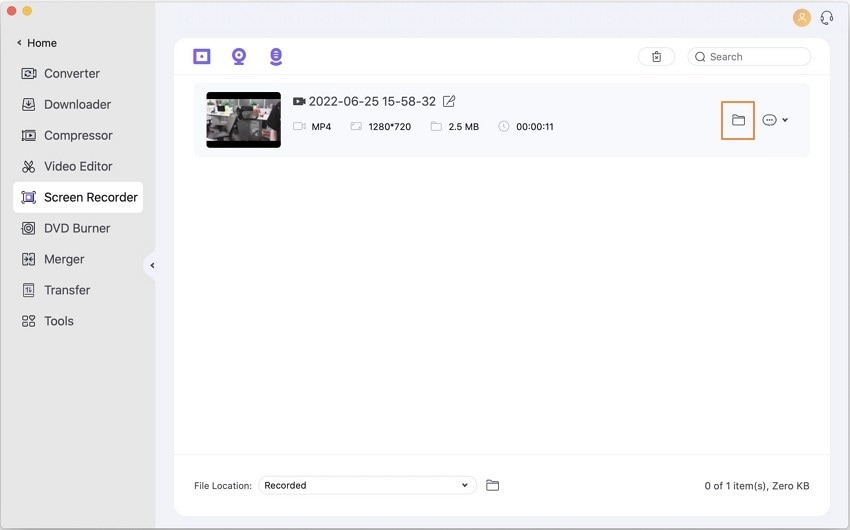
Open Wondershare UniConverter on your Mac computer, go to the Screen Recorder category from the list in the left pane and choose your preferred default save location for the recorded videos in the File Location field from the bottom.
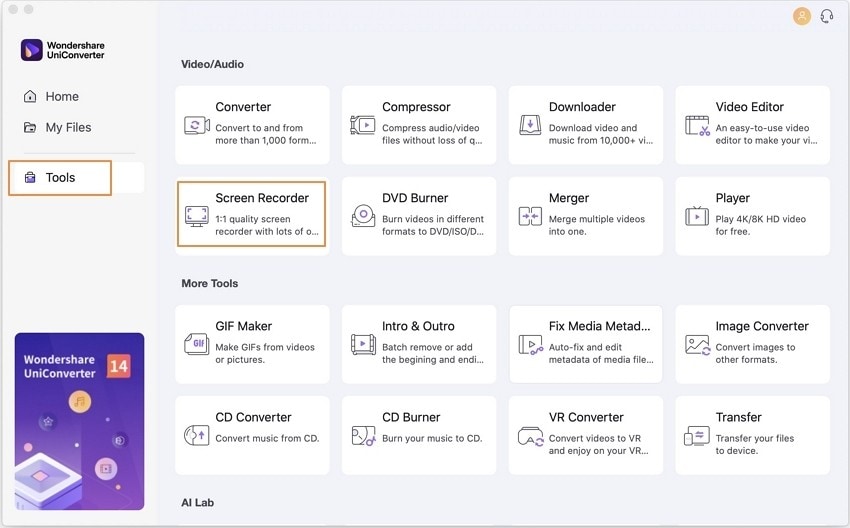
Next, click the icon from the upper-left area of the center window.
Step 2 Set up the audio recording preferences.
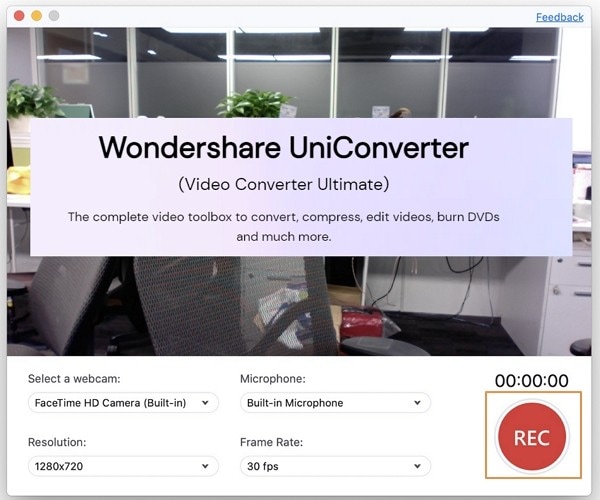
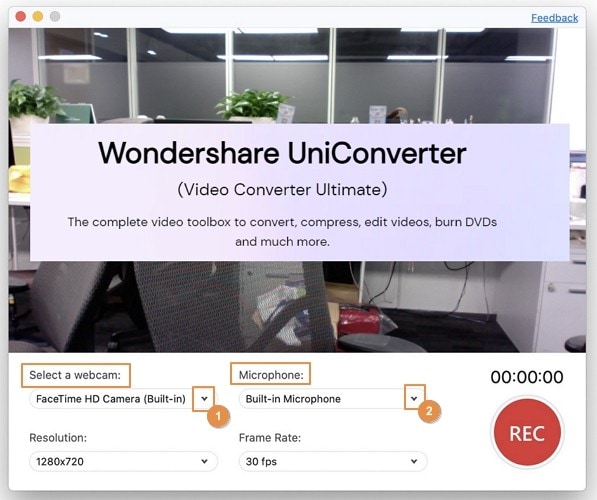
Choose your preferred input device from the Select a webcam andMicrophone drop-down list.
Step 3 Set up the video recording preferences.
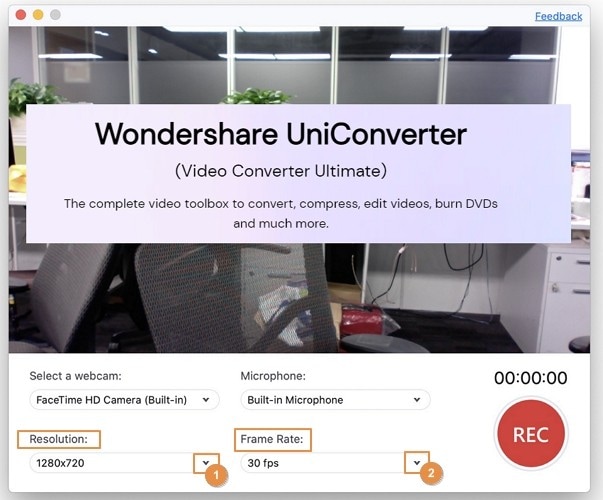
Select an appropriate resolution (usually the highest one) from the Resolution drop-down list, and check if the correct framerate is selected in the Frame Rate drop-down list.
Step 4 Start and stop the recording.
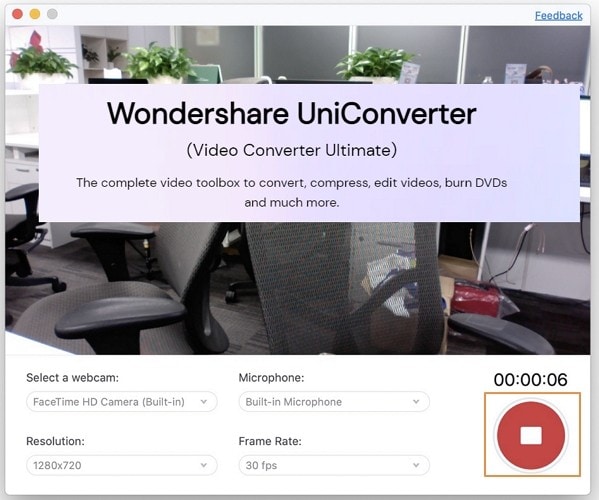
Click the REC button to begin webcam recording. Once done, click Stop to stop the record and automatically save the footage. You can access the recorded video by either clicking Open from the main window, or by going to the saved location that you selected in Step 1.