UniConverter User Guide
FAQs
How to use Picture-in-Picture feature with Wondershare UniConverter
Wondershare UniConverter for Mac (originally Wondershare Video Converter Ultimate for Mac) can record yourself from the system’s camera along with the screen that is playing. It allows recording streaming videos, FaceTime Video calls, Skype Video Calls, and other desktop activities. The videos are recorded in high-quality along with the audio as well. To help you with how to use Picture-in-Picture feature on Mac, given below is a step-by-step guide.
How To Record The Screen With Audio On Mac-Wondershare UniConverter (Mac) User Guide
Step 1 Launch the screen recorder on Mac.
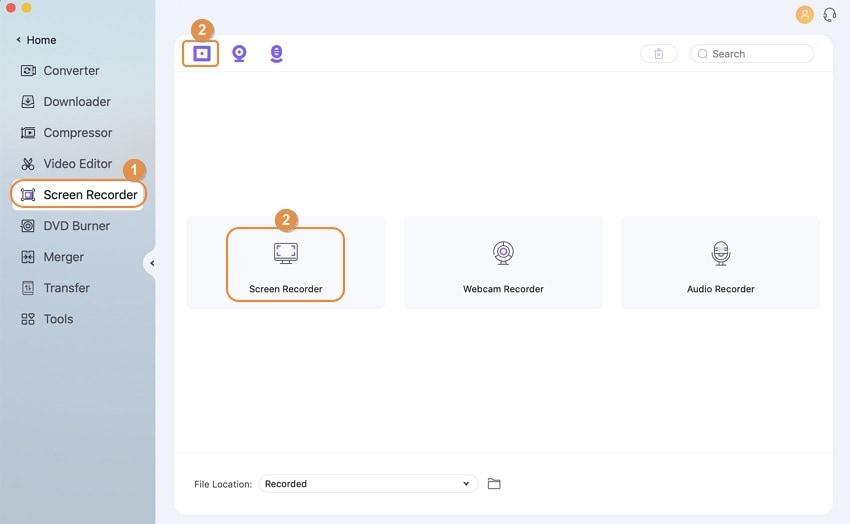
After Wondershare UniConverter has been successfully downloaded and installed on your Mac, launch it. Click Screen Recorder from the left pane of the interface, click the Screen Recorder icon in the center area to start the recording, or click the ![]() icon present at the center's top-left area panel, and click Screen Recorder.
icon present at the center's top-left area panel, and click Screen Recorder.

Step 2 Choose the video recording settings.
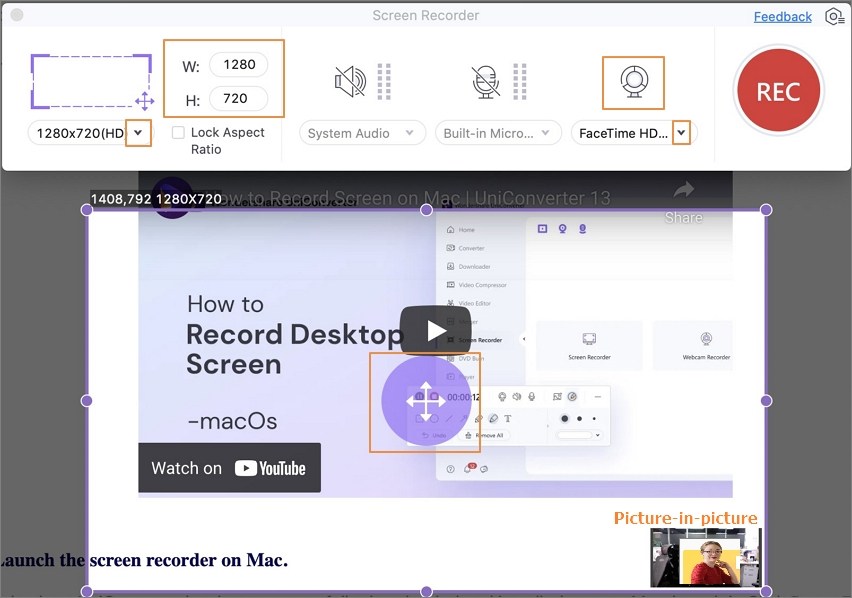
A screen recorder window will appear, from where you can customize the screen recording settings. And you can select the Webcam icon to activate the webcam if needed.
You need to select the area of the desktop that needs to be recorded. The Cross icon at the center will allow moving the entire recording frame while pinching the edges to adjust the width and the height. Alternatively, you can also enter the specific width and height of the desired area to be recorded.
Note: You can adjust the webcam window for PIP by dragging the edges of the webcam preview on the screen. And you can trun off the Webcam icon to hide the PIP webcam

To select the Full-Screen recording, choose it from the drop-down icon at Custom. The Full-Screen mode records the entire desktop screen while the Custom mode allows selecting the desired area as needed.

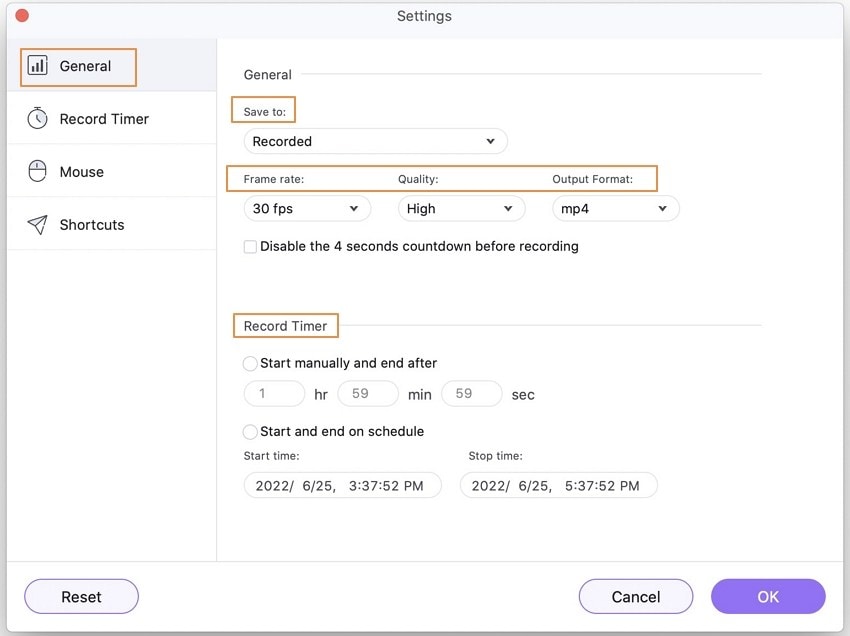
Additional Recording Settings: click on the setting icon to make other recording settings.
- Save to: Select the Mac location to save the recorded file.
- Frame rate: Frame rate of the video can be selected here from the drop-down options.
- Quality: The quality of the video can be selected here.
- Record Timer: The section allows you to set the recording time as needed. You can choose to start manually and then stop the recording at a fixed time or choose the start and the stop time of the record.
- Mouse: The settings for using the mouse can be adjusted from this section. If needed, enable the options to Show Mouse Click in Recording and Play Mouse Click Sound.
- Start/Stop Recording: Shortcut key as desired for starting and stopping the recording can be selected here.
If you want to go back to the original settings, click on the Reset button.

Step 3 Start recording the screen with audio on Mac.
Once all settings are done, click on the REC button, and with 3 seconds of the countdown, the software will start recording your desktop activities.

Step 4 Stop recording.
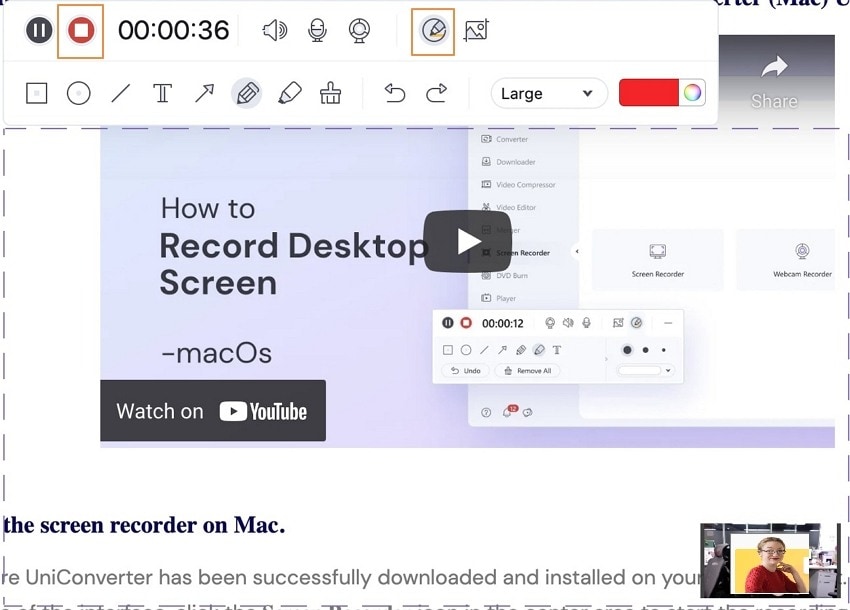
The Recording taskbar shows the time for which the video is being recorded. Once the recording is no more required, click on the Red Stop button. As the process completes, the Mac location with recorded video appears on your screen.


 print
print