UniConverter User Guide
FAQs
How to Edit/Create/Add Subtitle to Video on Mac
Are you looking for a useful Subtitle Editor for Mac? Wondershare UniConverter 13 for Mac supports adding .srt files to MP4, QuickTime, and many other videos. If you have no ideas for finding suitable subtitles for your movie or video files, you can use the Search function built-in in this software. Also, Wondershare UniConverter 13 for Mac supports the advanced function of automatically recognizing subtitles for your videos. Check the detailed how-to-use steps to create, add, edit subtitles for videos on your Mac.
Part 1. How to add subtitle to video on Mac (Optional to edit subtitles)
Part 2. How to create .srt files on Mac
Part 3. How to generate auto-subtitles for your videos on Mac
Part 1. How to add subtitle to video on Mac (Optional to edit subtitles)
Follow the below steps to add subtitles to MP4 / MKV / MOV or other format videos easily:
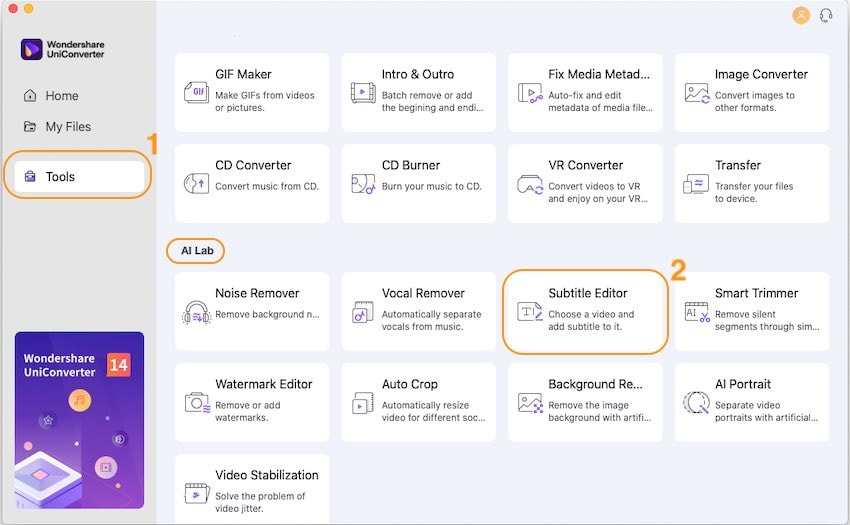
Step 1 Open Subtitle Editor in Toolbox to import your videos.
Download, install and open Wondershare UniConverter 13 for Mac, click Toolbox > Subtitle Editor to import your video files. Choose the video on Mac for which you want to create subtitles, click Load to import your videos on Mac to UniConverter 13 for Mac successfully.
Step 2 Import the subtitle files (.srt files) to your video on Mac.
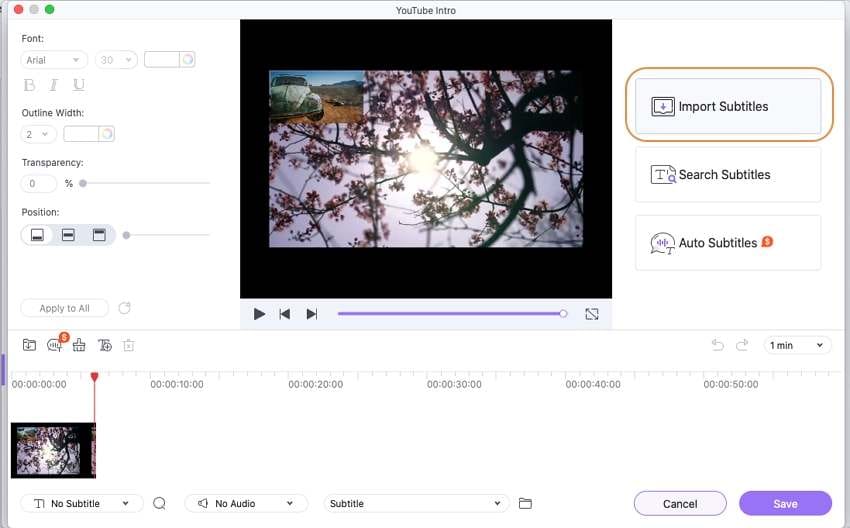
Click the Import Subtitles button on the right side to add your .srt files to videos.
Tips: If you have no ideas for finding the right subtitle file for your video, you can try the Search Subtitles function in this tool. It may help you find the subtitle files for your videos.
Step 3 Custom the display of subtitles.
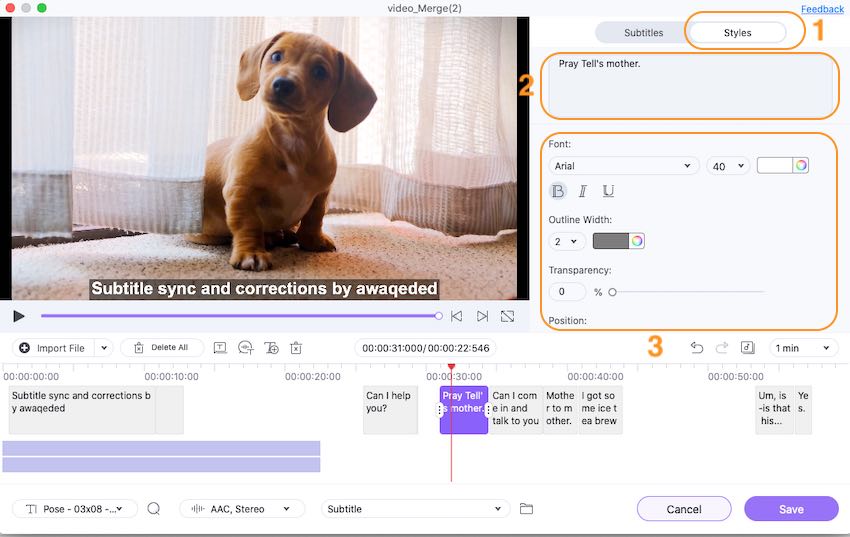
Select a line subtitle and change its Font, Outline Width, Transparency and Position by setting on the left area. If you want to set all subtitle lines in the same displaying format, you can click the Apply to All button after setting ones.
Step 4 Save your video with added subtitles quickly.
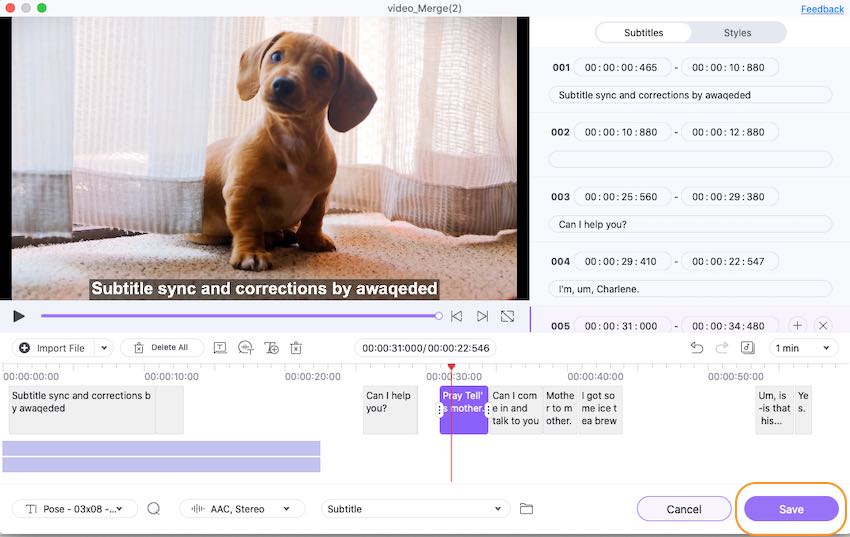
Finally, check all subtitles are correct for your video and click the Save button to export your videos with added subtitles.
Part 2. How to create .srt files on Mac
With Subtitle Editor in Wondershare UniConverter 13 for Mac, you can create a .srt file to add subtitles for any clips of your video.
Here are detailed steps to create subtitles for your video on Mac:
Step 1 Open Subtitle Editor in Toolbox to import your videos.
Go to Toolbox > Subtitle Editor, and choose the video on Mac for which you want to create subtitles to import to UniConverter 13 for Mac successfully.

Step 2 Select timeline to add subtitles.
Click the T icon on the left corner to open the interface of texting subtitles, select the time period of the video to add a line of subtitles by set the Start and End time, then type your subtitles in the Text box. On the left side panel, you can custom the Font, Size, Color, Bold, Italics, Underline, and Position option.
Tips: If you want to apply your custom settings to all lines of added subtitles, you can add all subtitles first and set the Font, Position and other option once, and then click the Apply to All button to apply these settings to all subtitle lines.
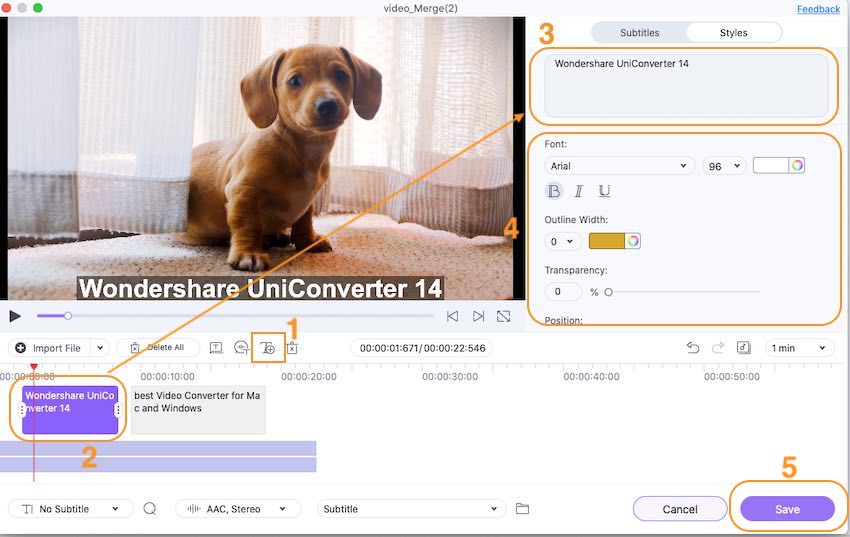
When adding all subtitles for your video, click the Save button to export your video with subtitles.
Part 3. How to generate auto-subtitles for your videos on Mac
Auto-Subtitles is a new powerful value-added function in Subtitle Editor of UniConverter 13, which helps you to generate subtitles for your video with speech recognition. But it is not free and you can choose the most suitable service plan according to the length of your video.
Steps to automatically generate subtitles for your videos on Mac:
Step 1 Add your videos to Subtitle Editor in Toolbox and launch the Auto-Subtitles function.
Open Wondershare UniConverter 13 for Mac, click Toolbox > Subtitle Editor to import the videos and choose Auto-Subtitles on the right side.
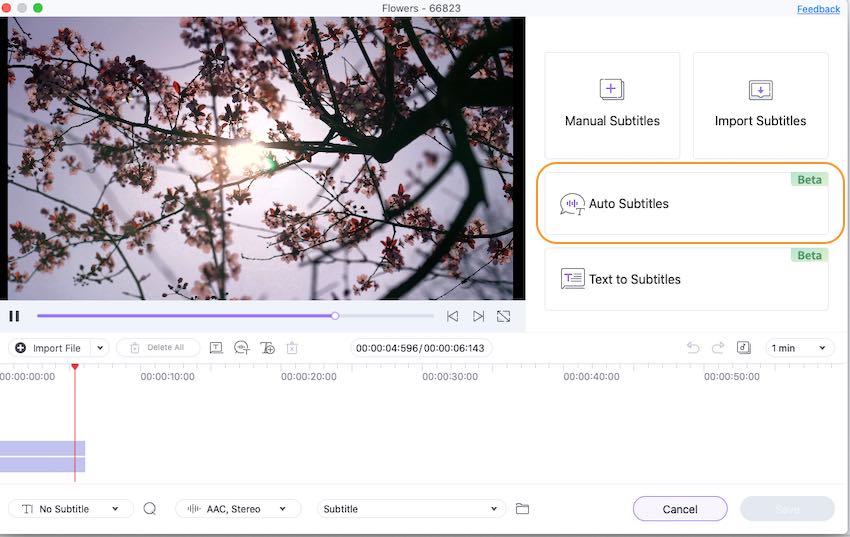
Step 2 Choose the Language of your video and start recognizing.
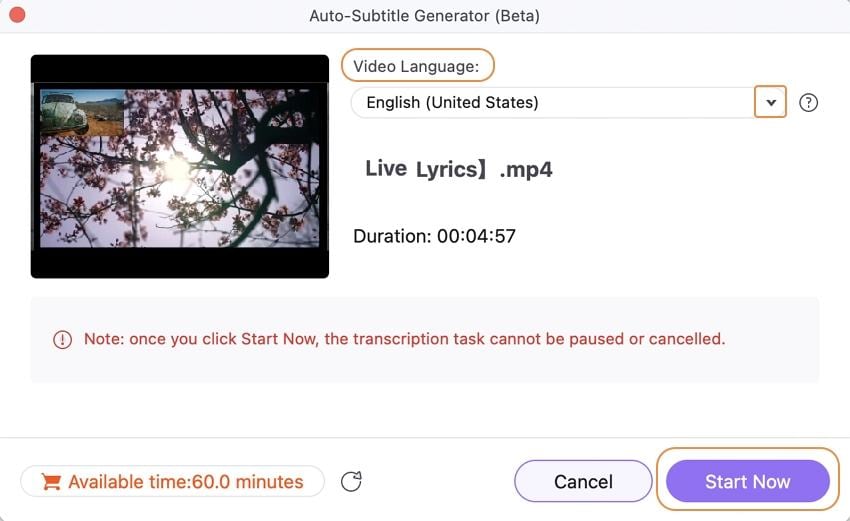
In the pop-up window, choose the language of your video and click the Start Now button to start the auto-recognizing process.

 print
print