UniConverter User Guide
FAQs
How to transfer video/audio files to external hard drive
The all-new Wondershare UniConverter can even detect an external hard drive that you connect to your PC. This is helpful when you want to back up your videos, and in this course, want to transfer them to a backup storage device, that in most cases is an external HDD. Here is how you can transfer your favourite media clips to an external hard drive that is connected to your computer:
How to Transfer Video/Audio to External Hard Drive - Wondershare UniConverter (Win) User Guide
Step 1 Go to the Transfer box.
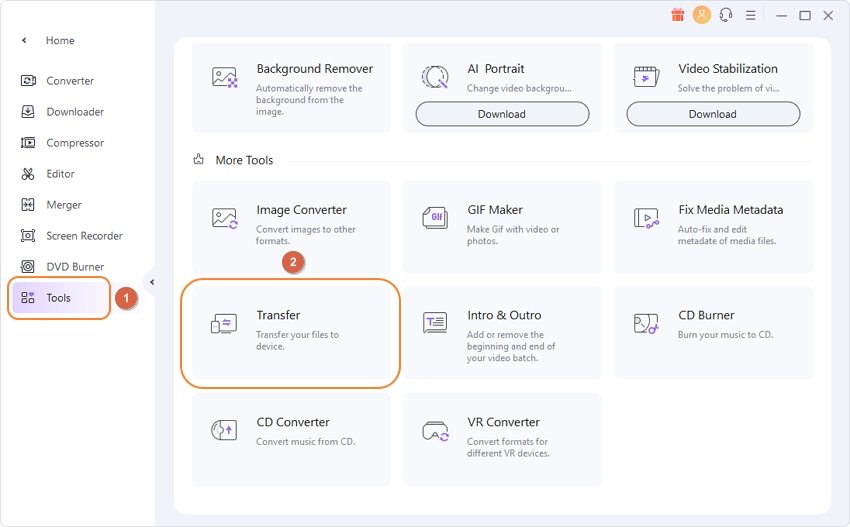
Launch Wondershare UniConverter, select Toolbox from the category list in the left, and click Transfer from the right window to open the Transfer box.

Step 2 Connect your external HDD.
Use the USB cable to connect your external hard drive to the computer, and if/when UniConverter prompts, agree to the confirmation to establish trust between your HDD and the app.
Step 3 Import the Media to UniConverter.
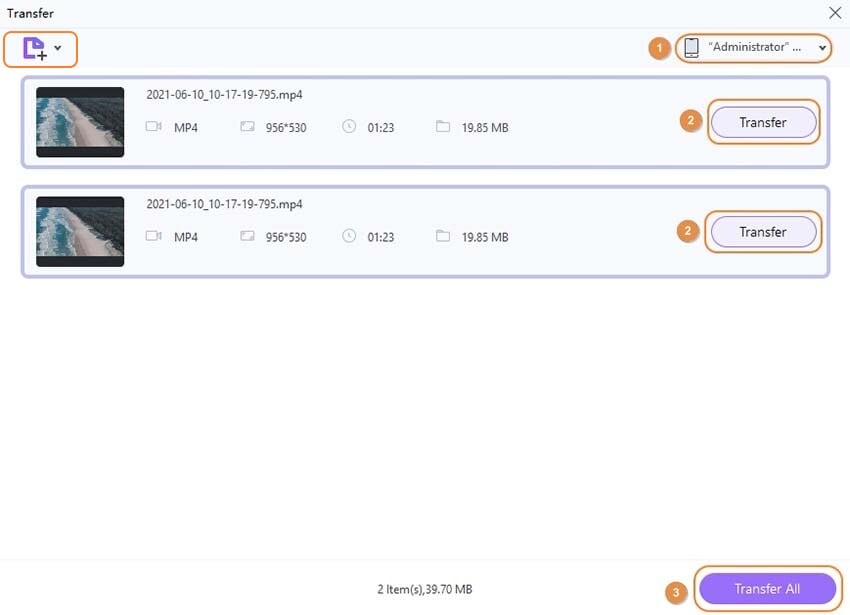
Click the drop-down button from next to the Add Files icon at the top-left corner, and either click Add Files or Add Folder to import media clips individually or in bulk from a single folder respectively. Alternatively, you can also drag and drop the files from your PC to the Transfer box to expedite the import process.

Step 4 Choose a disk volume and transfer.
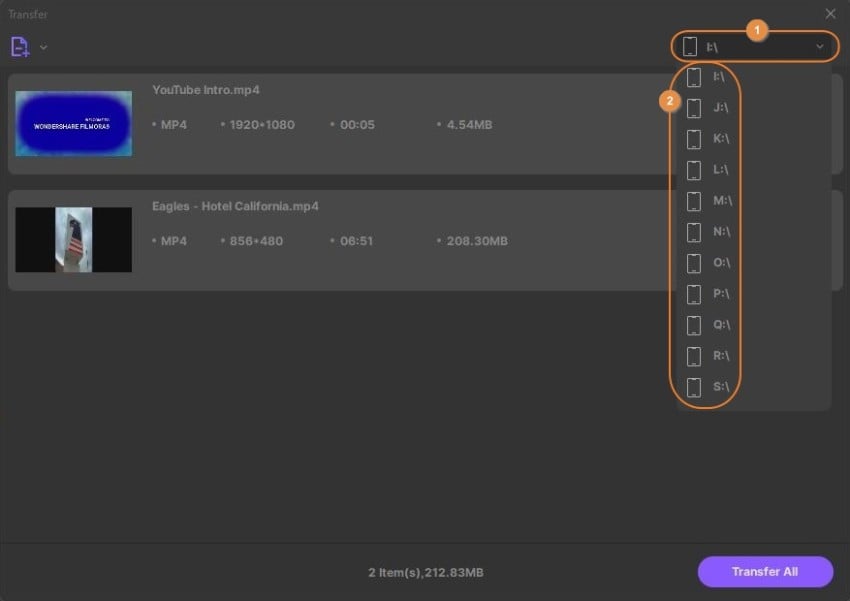
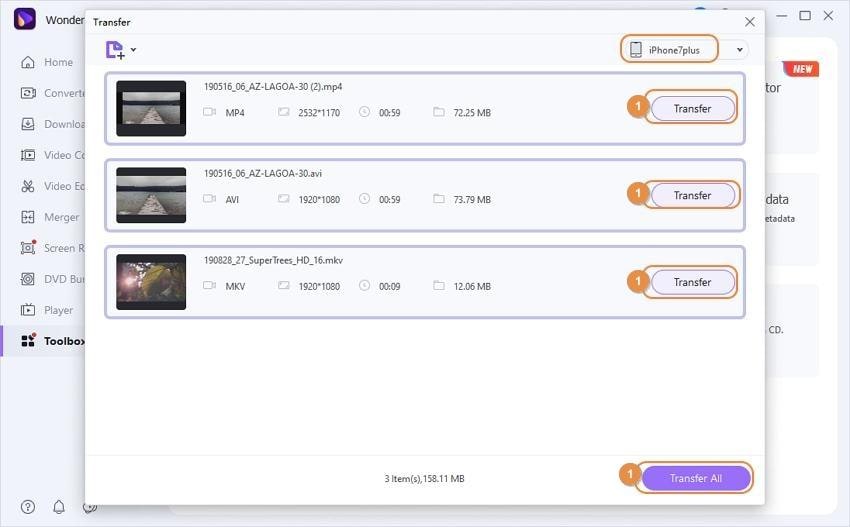
If the external HDD has multiple volumes, choose your preferred one by clicking the drop-down list at the top-right corner of the Transfer box, and selecting a corresponding drive letter. Once selected, click Transfer from the right side of the media file or Transfer All from the bottom-right corner to send individual video or all of them to the HDD in a single go respectively.


 print
print