UniConverter User Guide
FAQs
How to Auto Trim Clips on Mac in One Click
In video editing on Mac, you may usually need to trim video and find it is not such an easy job because of the repeat trimming operations. Wondershare UniConverter 13 for Mac offers a new powerful value-added smart trim feature, which can help you auto trim clips. It is based on recognizing irregular audio in the video, if the audio clip matches the condition you set, such as the audio volume is too low, this part of the video will be recognized and hidden (deleted) automatically. Check out more details in the below step-by-step guide on how to auto-trim clips on Mac.
Steps on how to smart trim videos on Mac:
Step 1 Launch Wondershare UniConverter 13 for Mac.
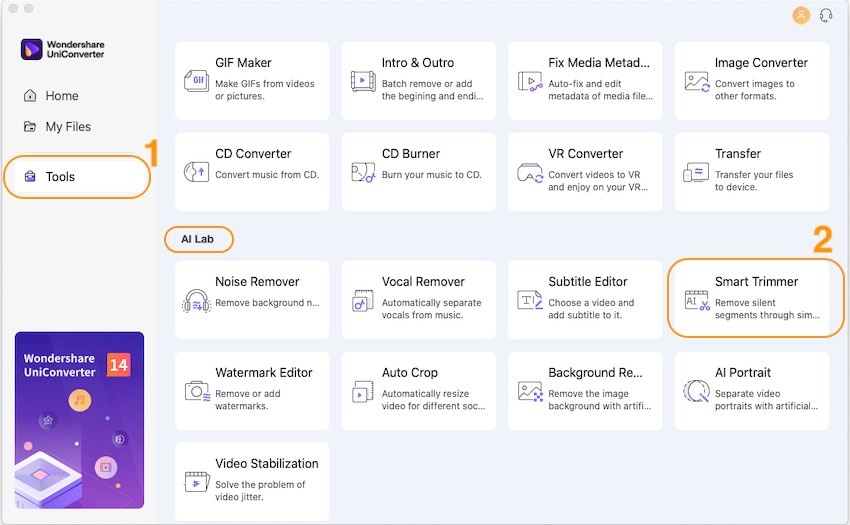
Open Wondersahre UniConverter 13 for Mac after installation, click on the Toolbox tab, you will find 10 additional features list here, including the Smart Trimmer. Click on the Smart Trimmer to import your desired files on Mac.
Step 2 Start pre-settings for smart trimming.
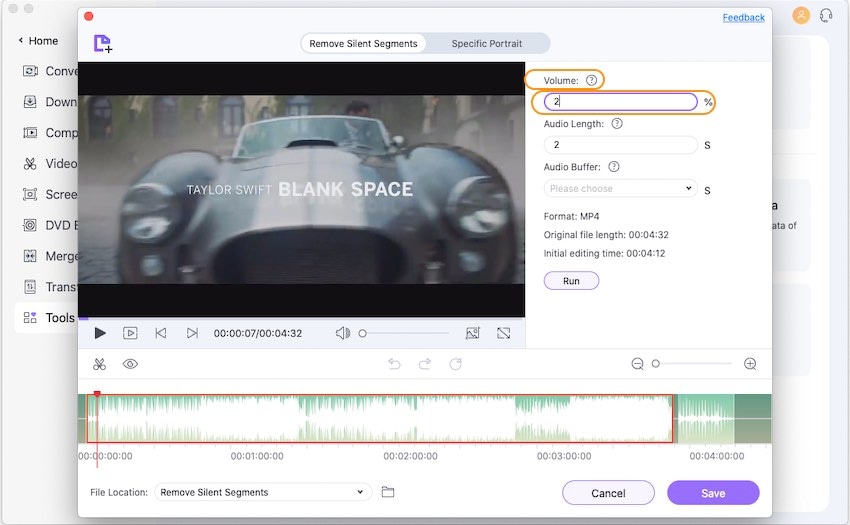
By default, this smart trimmer will auto-recognize the parts of the video where has no sound over 2s. Further, you have 3 options to pre-set the conditions for smart recognizing and trimming: Audio Volume, Audio Length, and Audio Buffer.
In the Audio Volume option, you can choose the volume percentage from 0 to 30% which means you want the Smart Trimmer to recognize the parts of clips that its audio volume is below the percentage level of the original video, such as if you choose 20%, the smart trimmer will auto-extract the parts where its audio volume is lower 20 if the max audio volume in the original video is 100.
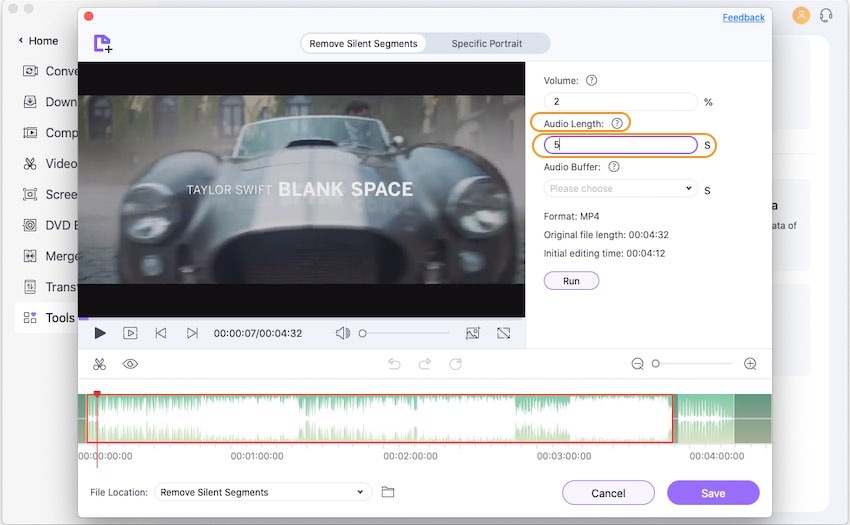
In the Audio Length option, you can choose to set this smart trimmer to recognize the parts of the video where has no sound during the time. This during time can be from 1- 20s.
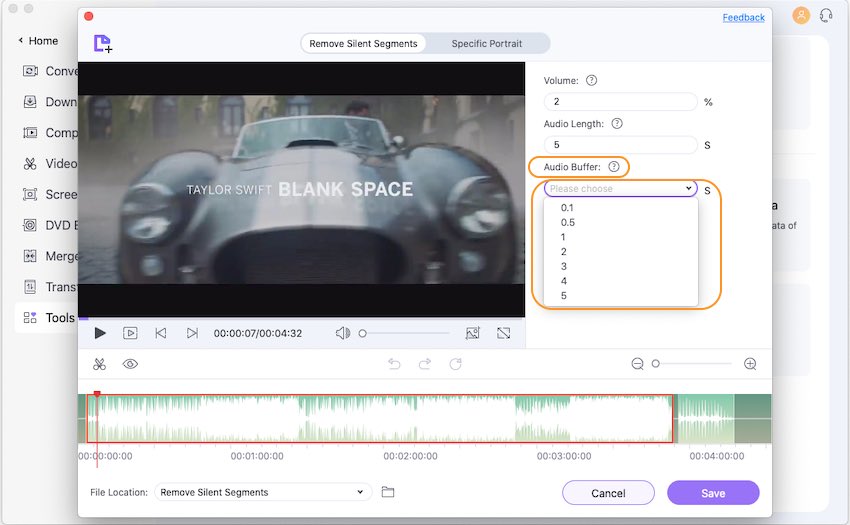
In the Audio Buffer option, you will have advanced choices to make your video trimming more smoothly. Here you can set the buffer area from 0.1s to 5s. Suppose you set 2s here, this smart trimmer will extend 2s in the recognized area which can be helpful if this area includes a special voice that not suitable for cutting directly, such as breathing.
Step 3 Smart trim videos on Mac successfully.
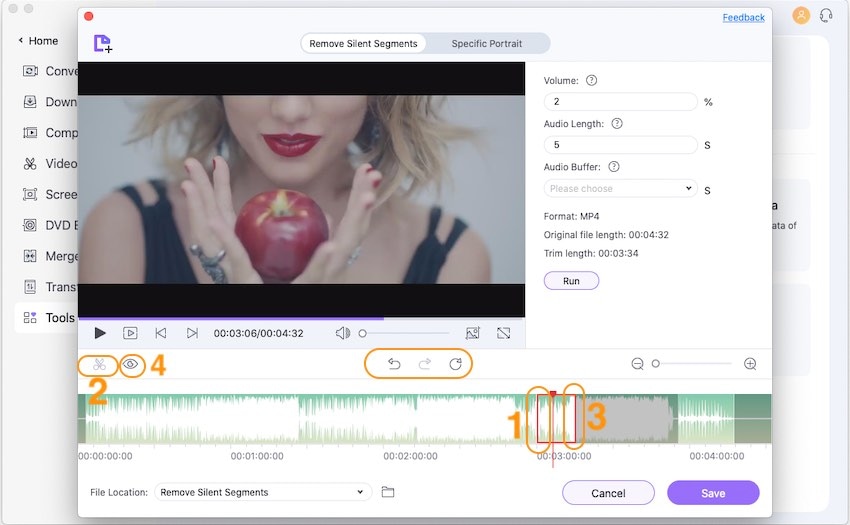
After all settings are done, click the Run button to start the smart trimming. Further, if you are not so satisfied with the auto-extract parts, you have more options to adjust the trimming area by moving the mark bar, using the Scissors icon to cut, and the Closed Eye icon to hide and delete the unwanted parts.
Step 5 Export the auto-trimmed clips in one click.
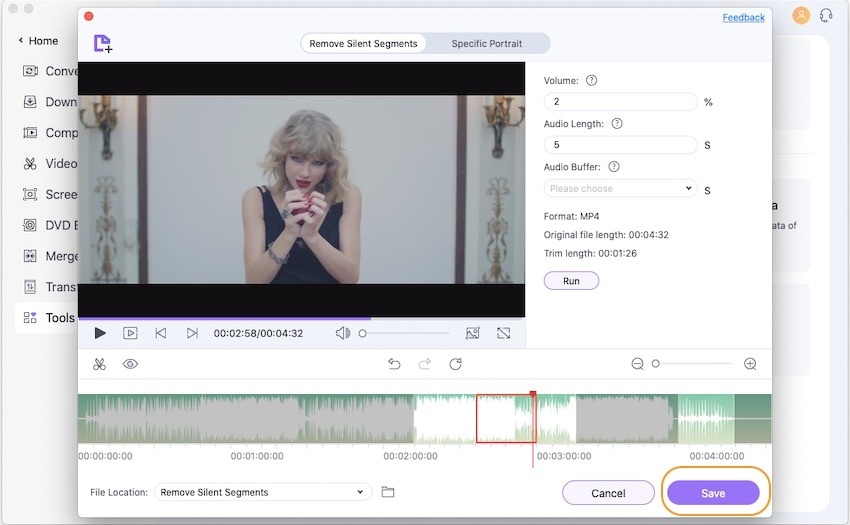
Finally, click the Save button to save the auto-trimmed video to your Mac easily.

 print
print