UniConverter User Guide
FAQs
How to Auto Trim Clips in One Click
Trimming videos is a common operation in video editing, but you may find it is an easy but very time-consuming task. Now Smart Trimmer in Wondershare UniConverter 13 can be the best helper for you to auto-extracting and deleting clips, with which you can smart trim videos by setting options to recognizing irregular audio in your videos. You can auto trim clips based on the audio volume and audio length, such as smart delete the clips whose audio volume is lower than 20% volume of the max volume in the original video or auto-extract clips that over 2s is mute in the original video.
Steps to smart trim videos with Wondershare UniConverter 13
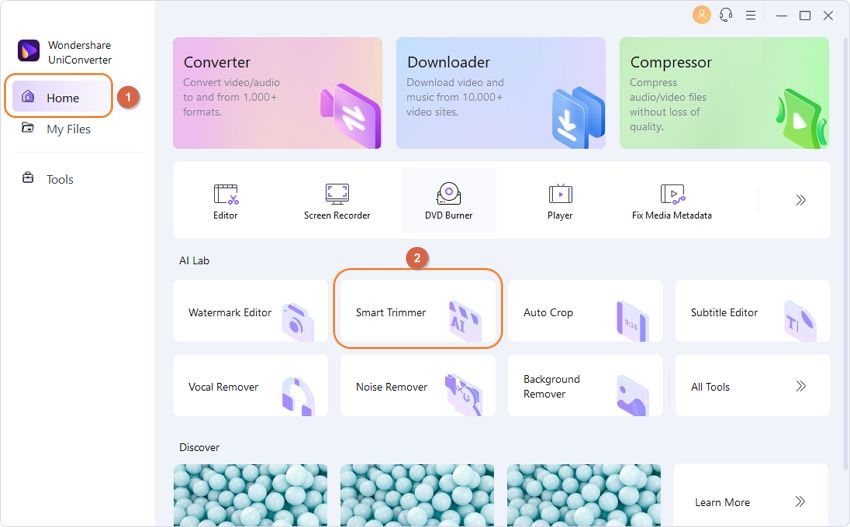
Step 1 Launch Smart trimmer in UniConverter 13.
Download, install and open Wondersahre UniConverter, you will enter the Homepage tab by default. Click Toolbox to open the interface of the additional tools in this software. Click the Smart Trimmer to open the window that you can import videos.
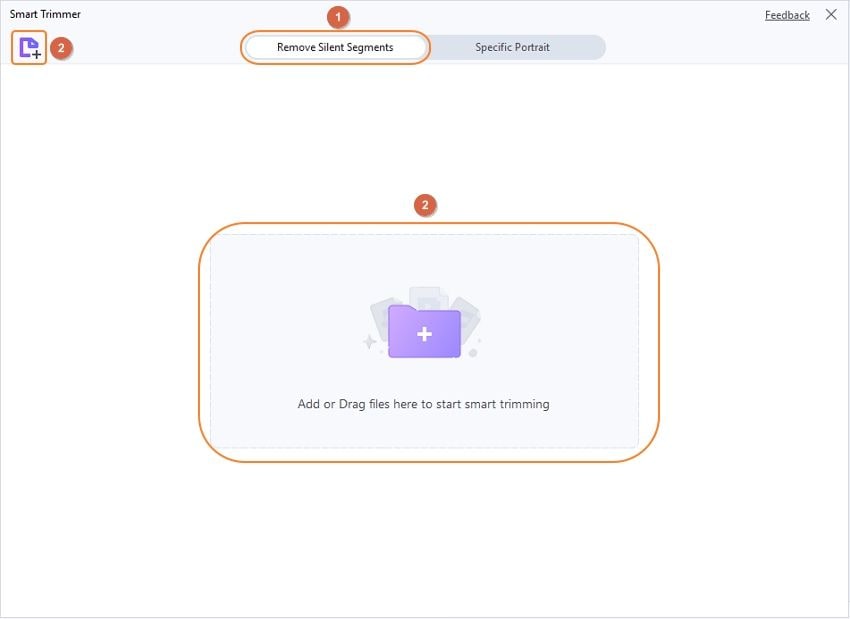
Step 2 Import videos to auto-trim clips.
Click the Add Files button to choose a file to import.
Step 3 Set recognition options for smart trimming.
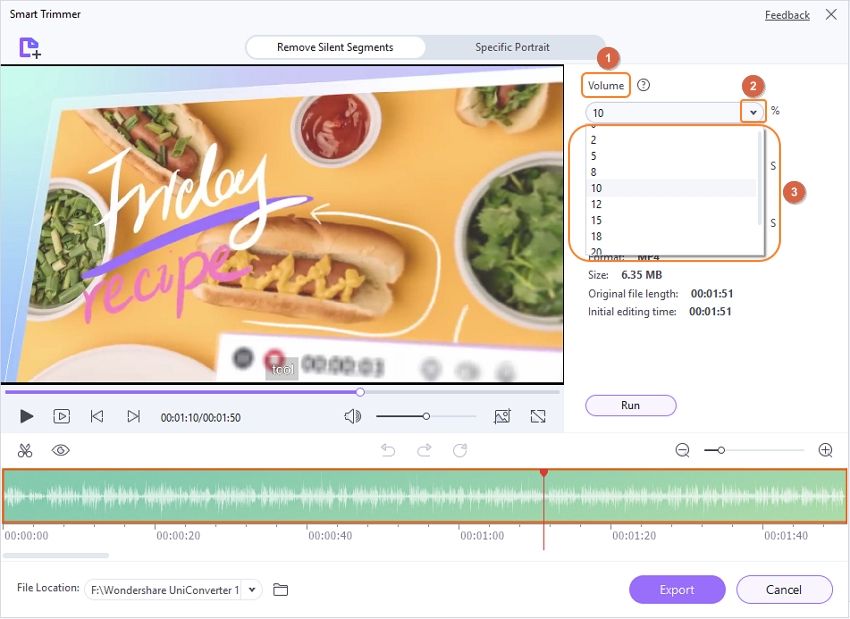
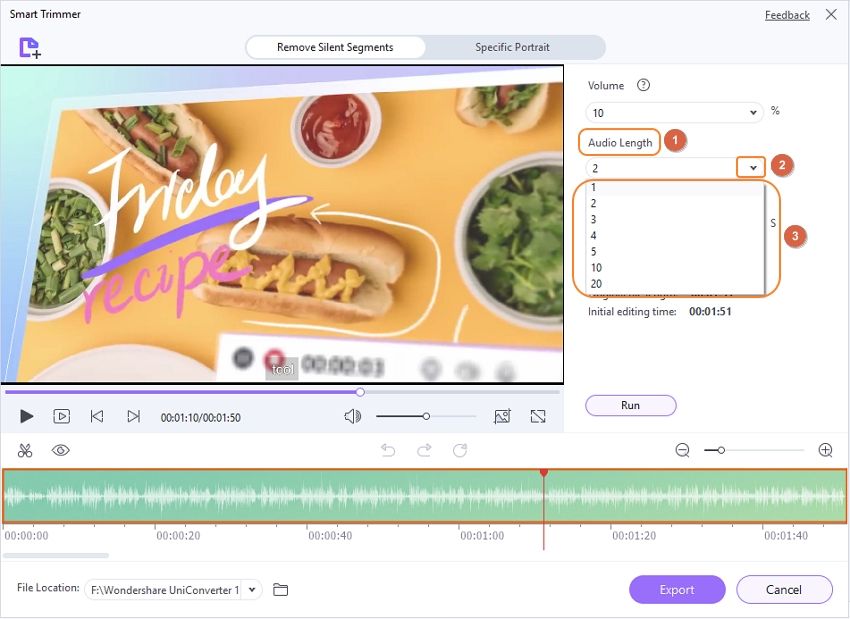
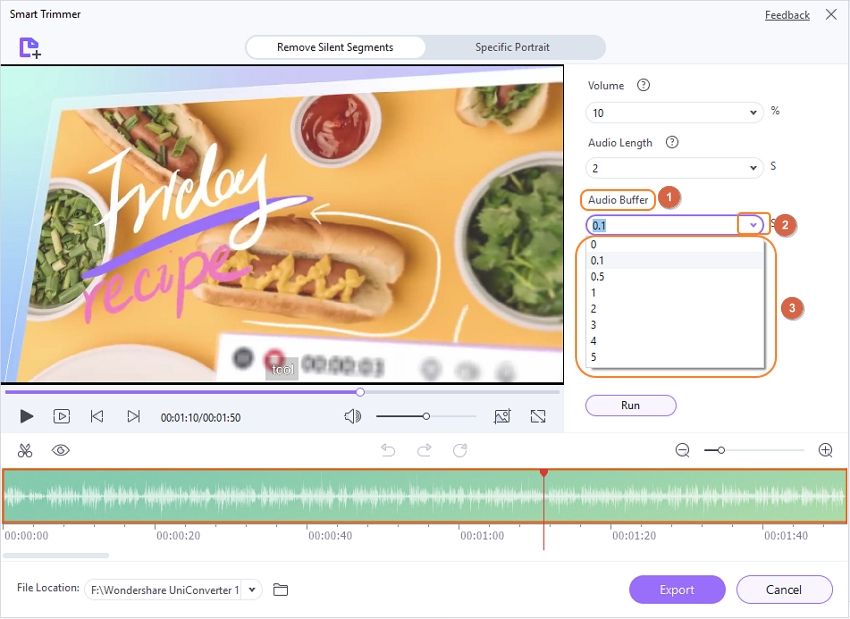
Before starting auto-trimming, you need to pre-set the conditions of audio which is based on recognizing the irregular parts of your video. There are 3 options you can set: Audio Volume, Audio Length, and Audio Buffer.
1. Audio Volume: You can choose 0 - 30% here which means you can set the Smart Trimmer to auto-recognizing and deleting the parts of your video that its audio volume is lower than the percentage you choose compared to the original video.
2. Audio Length: You can choose 1 - 20s here which means you can set the Smart Trimmer to auto-extract and delete the clips where is no sound over this 1 - 20s you set.
3. Audio Buffer: If you want to trim your video more precisely, you can set the extension area of the clipping node which can more intelligently identify some parts that meet the above two conditions but not suit to be trimmed for making video more smooth, such as the voice of speaker breathing. From Audio Buffer, you can set 1 - 5s to extend the buffer time.
Step 4 Adjust the auto-extract clips manually to improve the smart trimming.
After setting all recognizing conditions, click the Run button to get auto-trimmed clips which you can intuitively see which parts are hidden (should be delete) list on the timeline below. If you find there are more parts that should be deleted, you can use the mark bar to mark and select the parts to trim by clicking the Scissors icon, then click the Closed Eye icon to hide them. Relatively, select the part you don't want to delete and click on the Closed Eye icon to visible (keep) the parts.
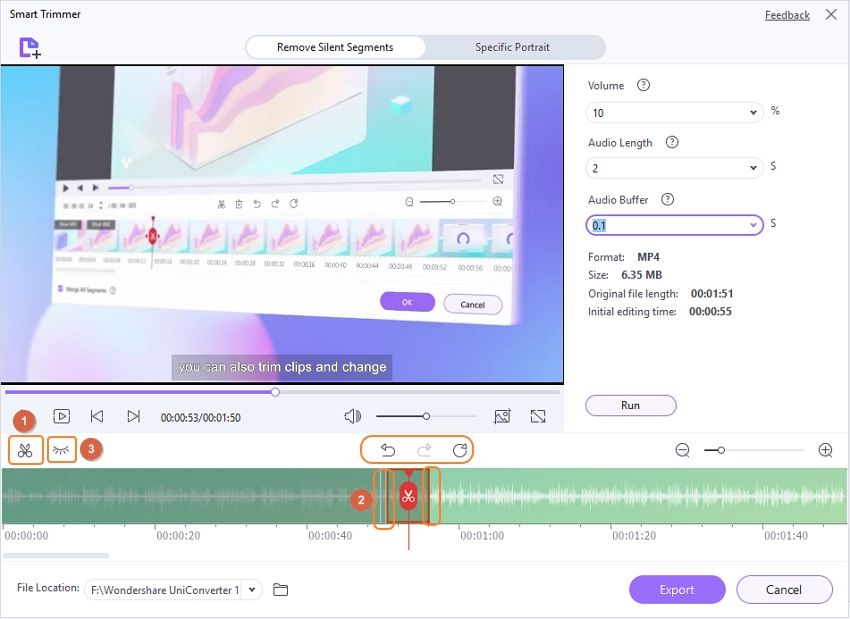
Tips: In this video editing, you can Undo, Redo, and Reset. the previous step.
Step 5 Export the auto-trimmed clips in one click.
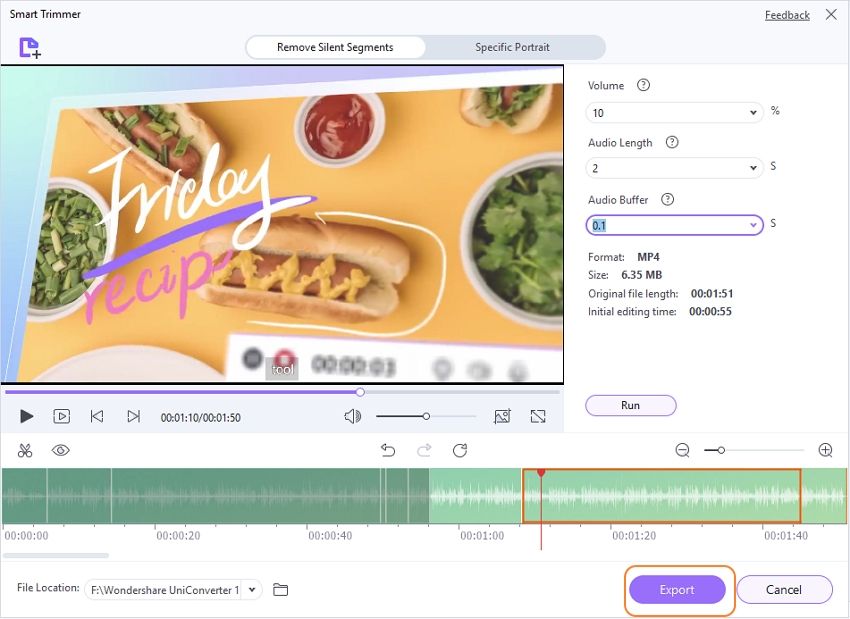
Finally, click the Export button to save the auto-trimmed video easily.

 print
print