Video Converter Ultimate Guide for Windows
- Convert
- Edit
- Download
- Burn
- Compress
- Play
- Stream
Get instant answers to common questions.
All solutions about video&audio convert, burn,download,edit and so on.
Downloaded a video but unable to play? Just export your videos from phone and convert it easily with Wondershare Video Converter Ultimate to make it compatible with your device. Please follow the steps below to convert your phone videos easily:
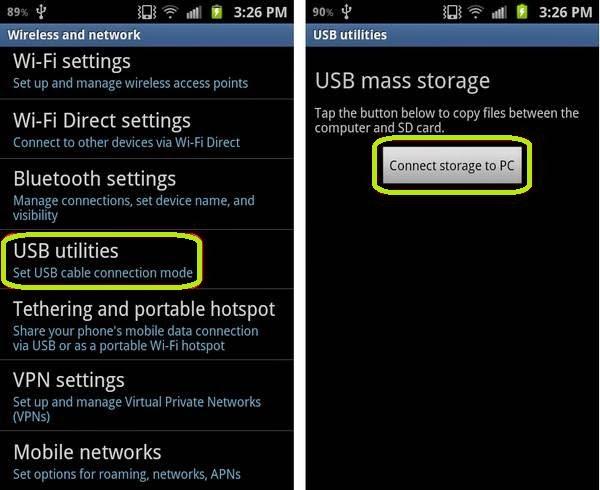
The very first step is to connect your phone to computer. There are several ways in which you can do so. You can USB or Bluetooth to connect your phone to your computer. Once you have plugged the USB to your phone, choose the USB data storage mode to start the transfer of files and videos.
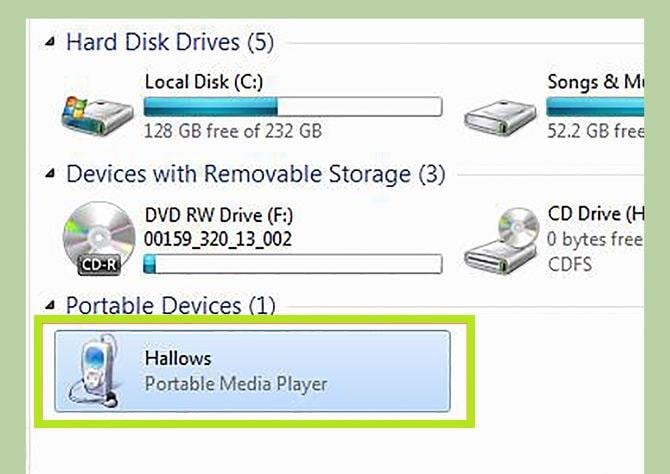
Once you have connected your phone to your computer, open “My Computer” and you will be able to see a new portable device added to your computer.
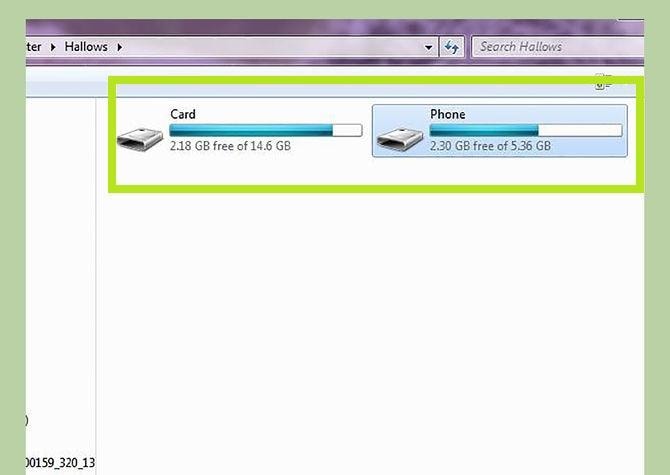
Double click on this portable media player and you can easily find the “Card” and “Phone” folders. Choose the folder where your videos are stored and copy it to your computer.
Once you have copied the videos to your computer, the next step is to launch the Wondershare Video Converter Ultimate.
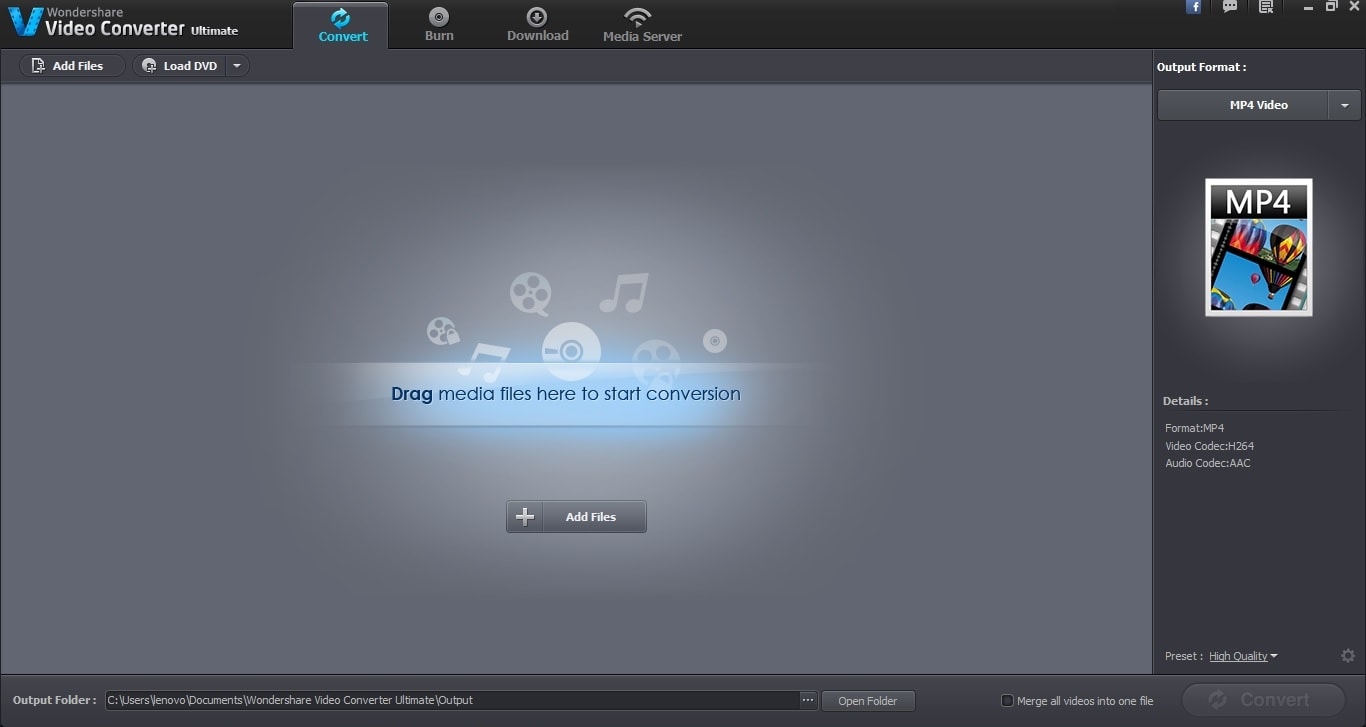
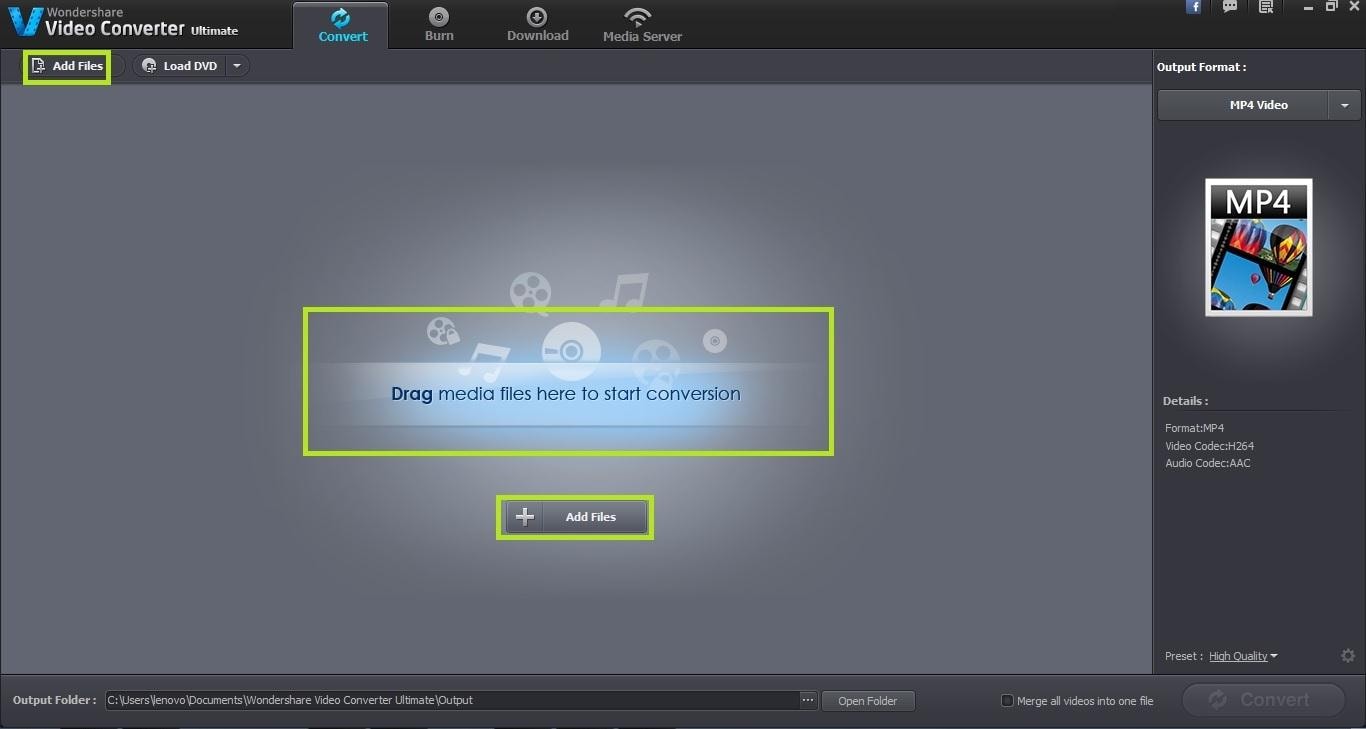
Once you have launched Wondershare Video Converter Ultimate, the very next step is to open the desired file in the software. You can open a specific file in the software by either using the windows explorer or by dragging the files into the interface. Clicking on “Add Files” will open the windows explorer from where you can choose the file.
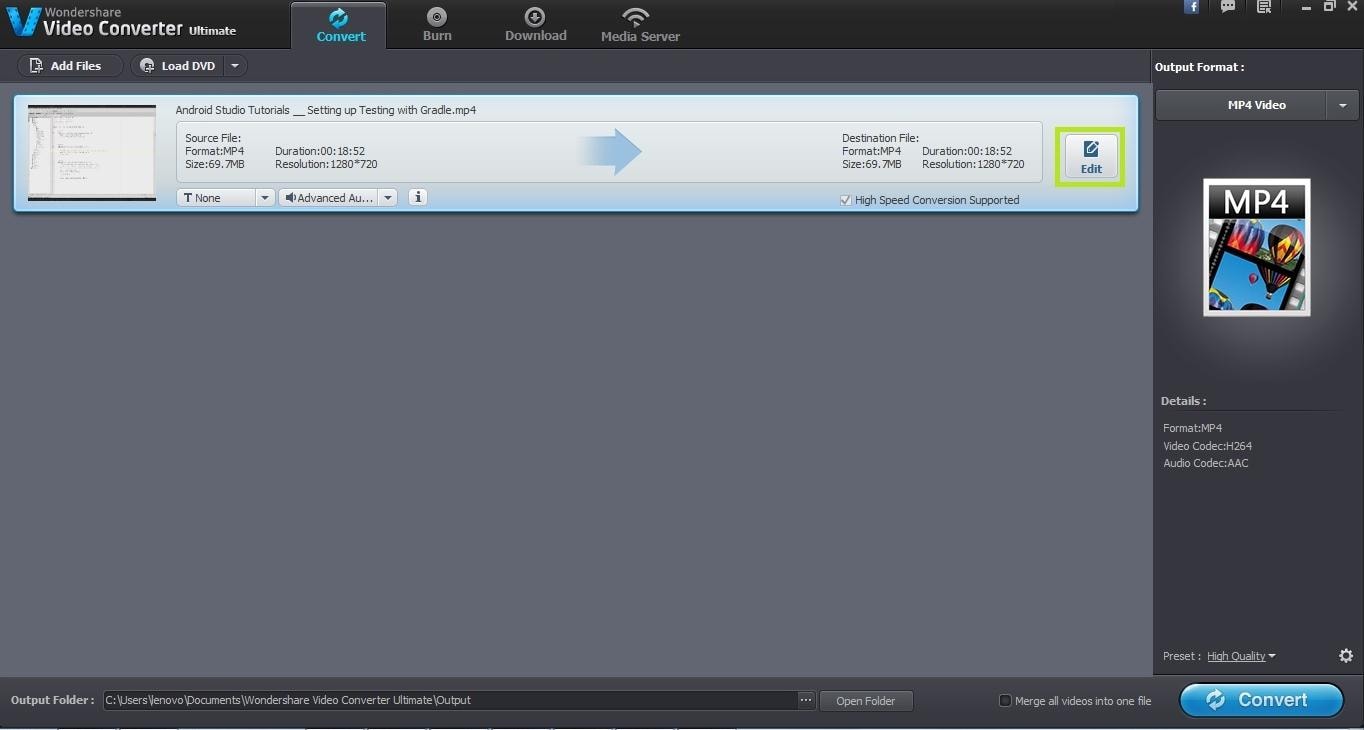
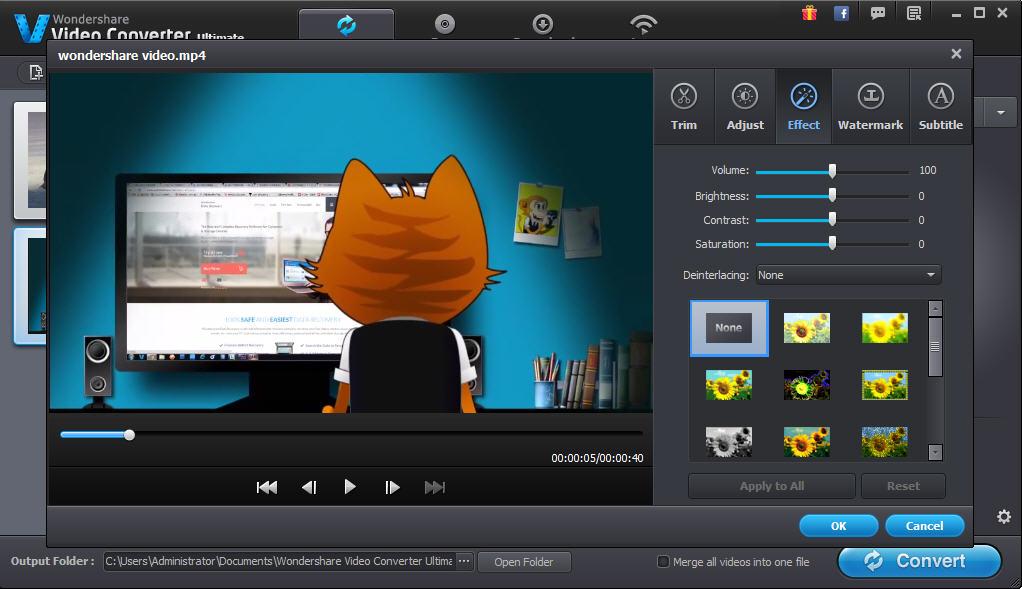
Once you have loaded the desired file in the interface, the next step is to edit the video. There are a number of editing options provided by Wondershare Video Converter Ultimate and you can easily use them to enhance the look of your video. This step is completely optional and you can skip it if you don’t want to make any changes to your video.
Choosing the output format is an important step as it is the step where you define the format in which your resultant file will be converted to. Wondershare Video Converter Ultimate provides a number of output formats according to audio, video and device. You can choose a format that suits you the best and then proceed to the next step.

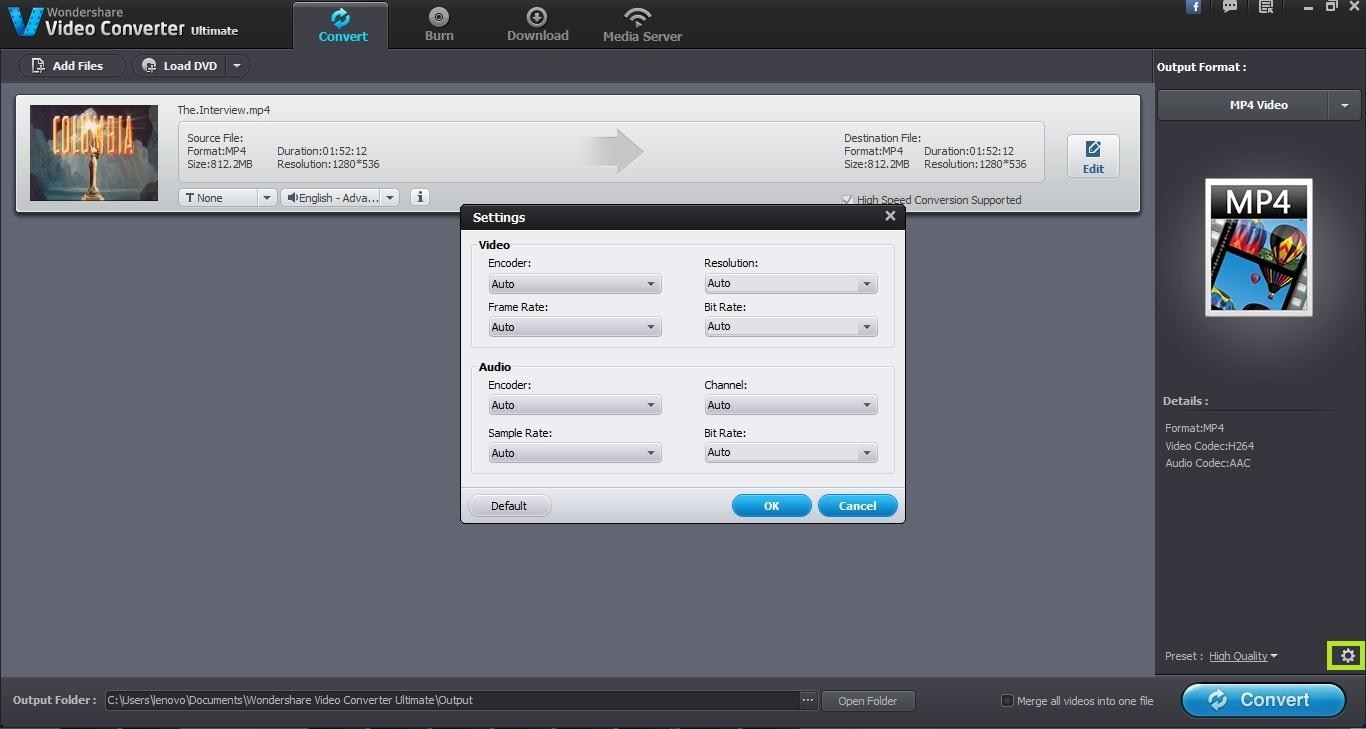
If you can’t find the desired format in the list, Wondershare Video Converter Ultimate also provides its users with the facility to create their own output format. Now you can also create your own custom output format by clicking on the “Settings” button. Choose the relevant options and click on “Ok” button to save the new format. This new format will now be available among the list of already available formats.
Apparently, the output folder is the one where the resultant converted file will be stored. By default, the resultant files are stored in the “Output” folder of Wondershare Video Converter Ultimate. However you can specify any other folder according to your wish here.
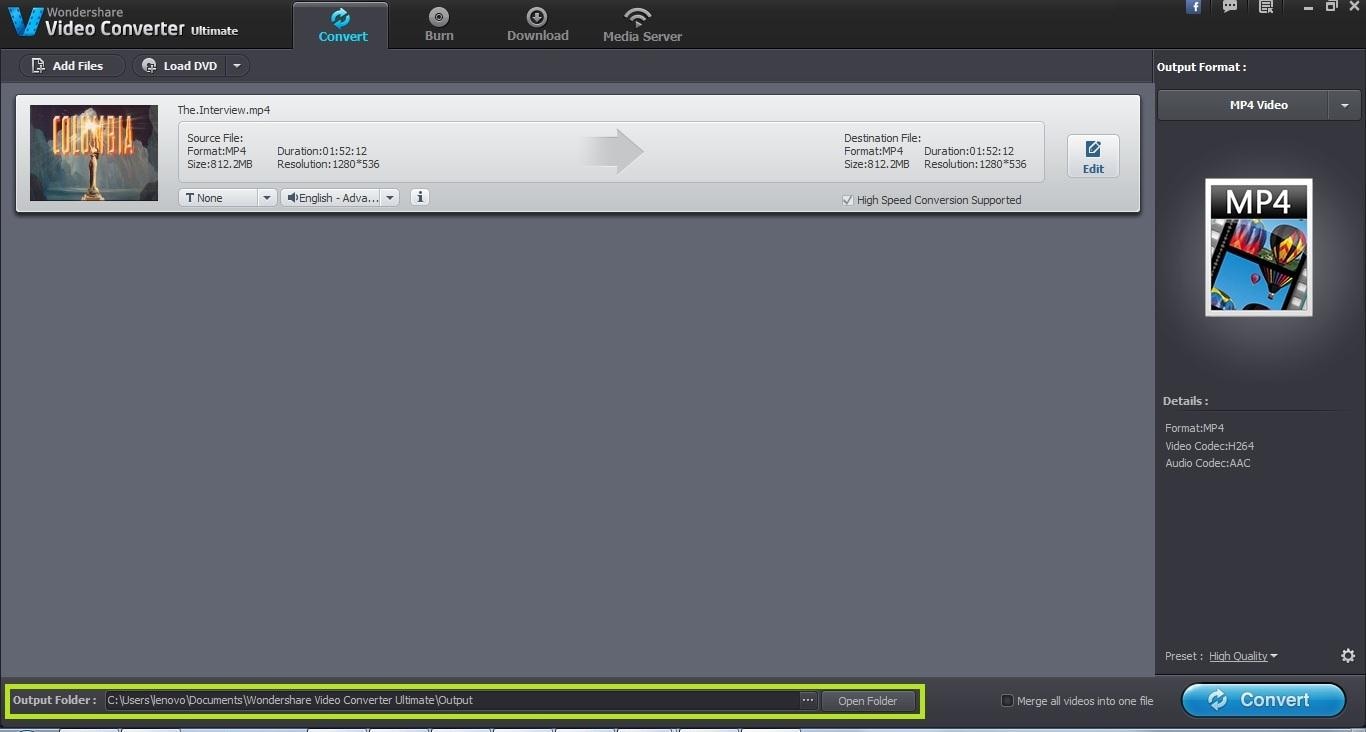
Once you have made all the settings, the next step is to start the conversion process by clicking on the “Convert” button at the bottom of the screen. Clicking on this button will start the conversion process and the duration of conversion will vary according to the length of the video. A notification message is displayed once the file has been converted.


One-Stop Solution to Convert, Download, Edit and Burn any Video/Audio Files with Ease.